Having the proper mix bus chain on your track is not only a key ingredient to professional-sounding mixes...
But it can shave hours off of your mixing process.
So what is the best mix bus chain for creating a professional-sounding mix?
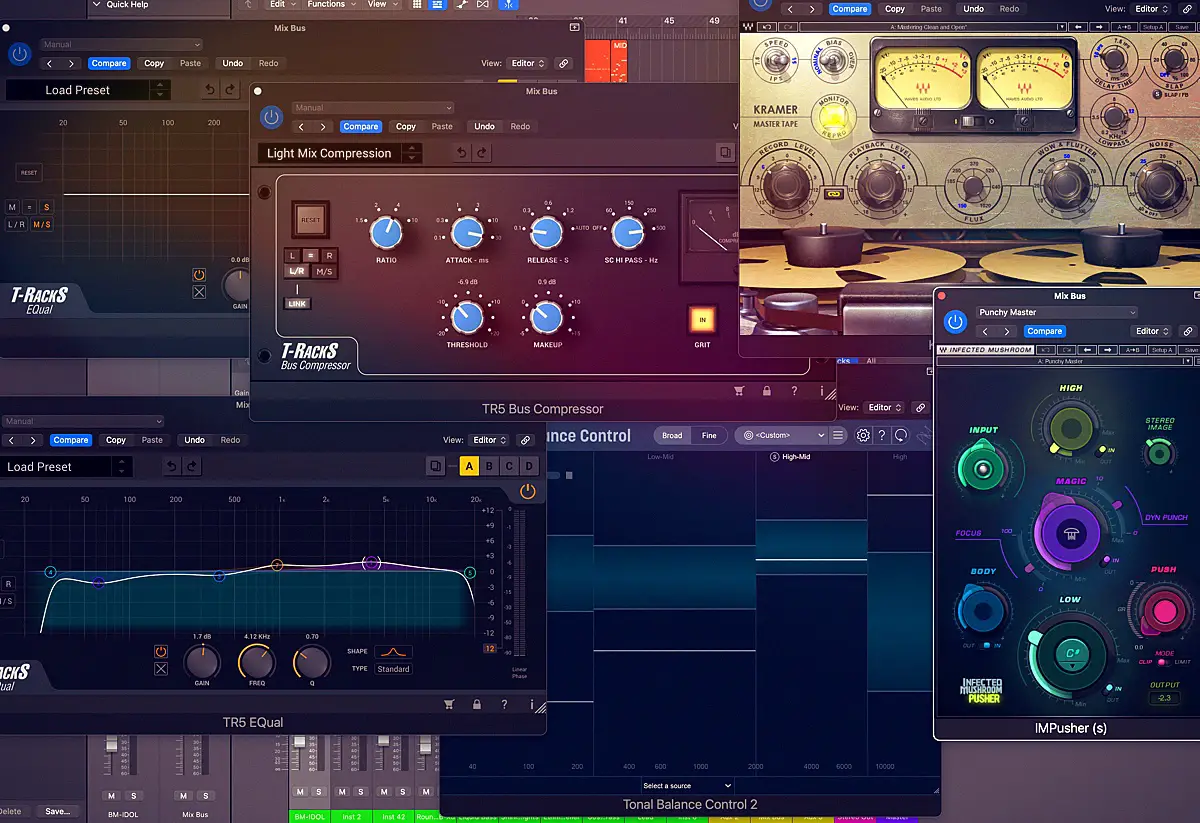
The best mix bus chain uses, in order, a parametric EQ, Mid-Side EQ, a compressor, Saturation, and Harmonic Enhancer. This combination of effects will help glue all of the tracks in a mix together, while also applying desirable punch, depth, and warmth.
So this is what your mix bus processing chain will look like:
Is Mix Bus Processing Necessary?
Technically, no. Nothing is really necessary when it comes to music because it all depends on the "sound" that you're going for.
That said, mix bus processing can go a long way toward creating a crafting a professional mix, and it enables you to do so in much less time.
Mix bus processing is what is going to help you create a professional mix that almost sounds mastered.
This is because all of your tracks in your project are going to be fed to your mix bus where they are all summed together into one whole.
Any processing you put on the mix bus will shape all of your sounds at once.
Don't correctly, mix bus processing will help glue all of your tracks together, and add more desirable punch, depth, and warmth.
What Is A Mix Bus Chain?
A mix bus chain is simply the order in which you put effects/plugins on your mix bus.
The order in which you place plugins on your mix bus is important because each subsequent plugin is effecting what has already been effected by the previous plugin.
For example, if I add saturation first and then compression, I will be compressing the saturated sound.
Whereas if I put compression first and then saturation, I will be saturating the compressed sound.
How Do You Set UP A Mix Bus?
This will be a little bit different depending on your DAW, but I'll show you how I do it in Logic.
Of course, your digital mixer will have a "stereo out" channel, but we don't really want to use this as our mix bus, although technically it's the same thing.
The reason we don't want to use the stereo out channel as our mix bus is because it's a good idea to mix with references, and if you use the stereo out as your mix bus and place effects on it...
Then you'll also be effecting your references, which defeats the whole purpose of using references.
So you'll want to create a separate track that you'll route all of your tracks to before they continue on their journey to the stereo out. Here's how you do it:
Create An Auxiliary Track
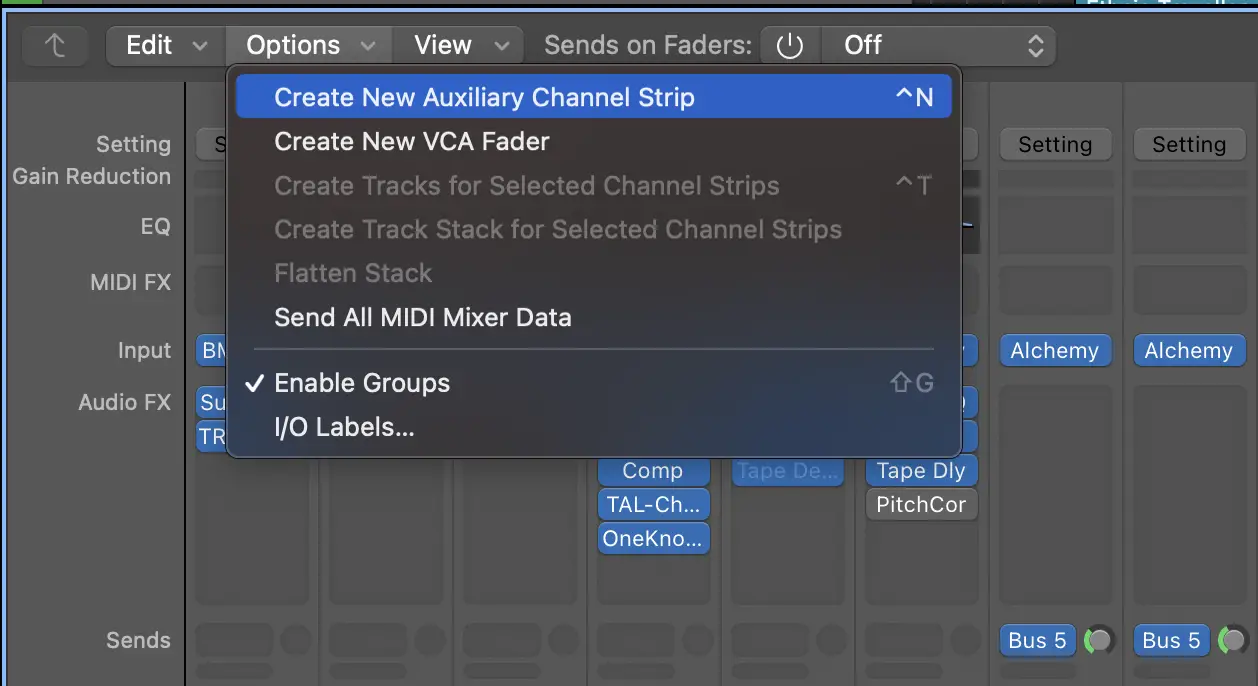
Your first step is to create a new Aux track in your DAW.
This is the track that we'll be using for the mix bus.
Choose A Bus & Route All Of Your Tracks
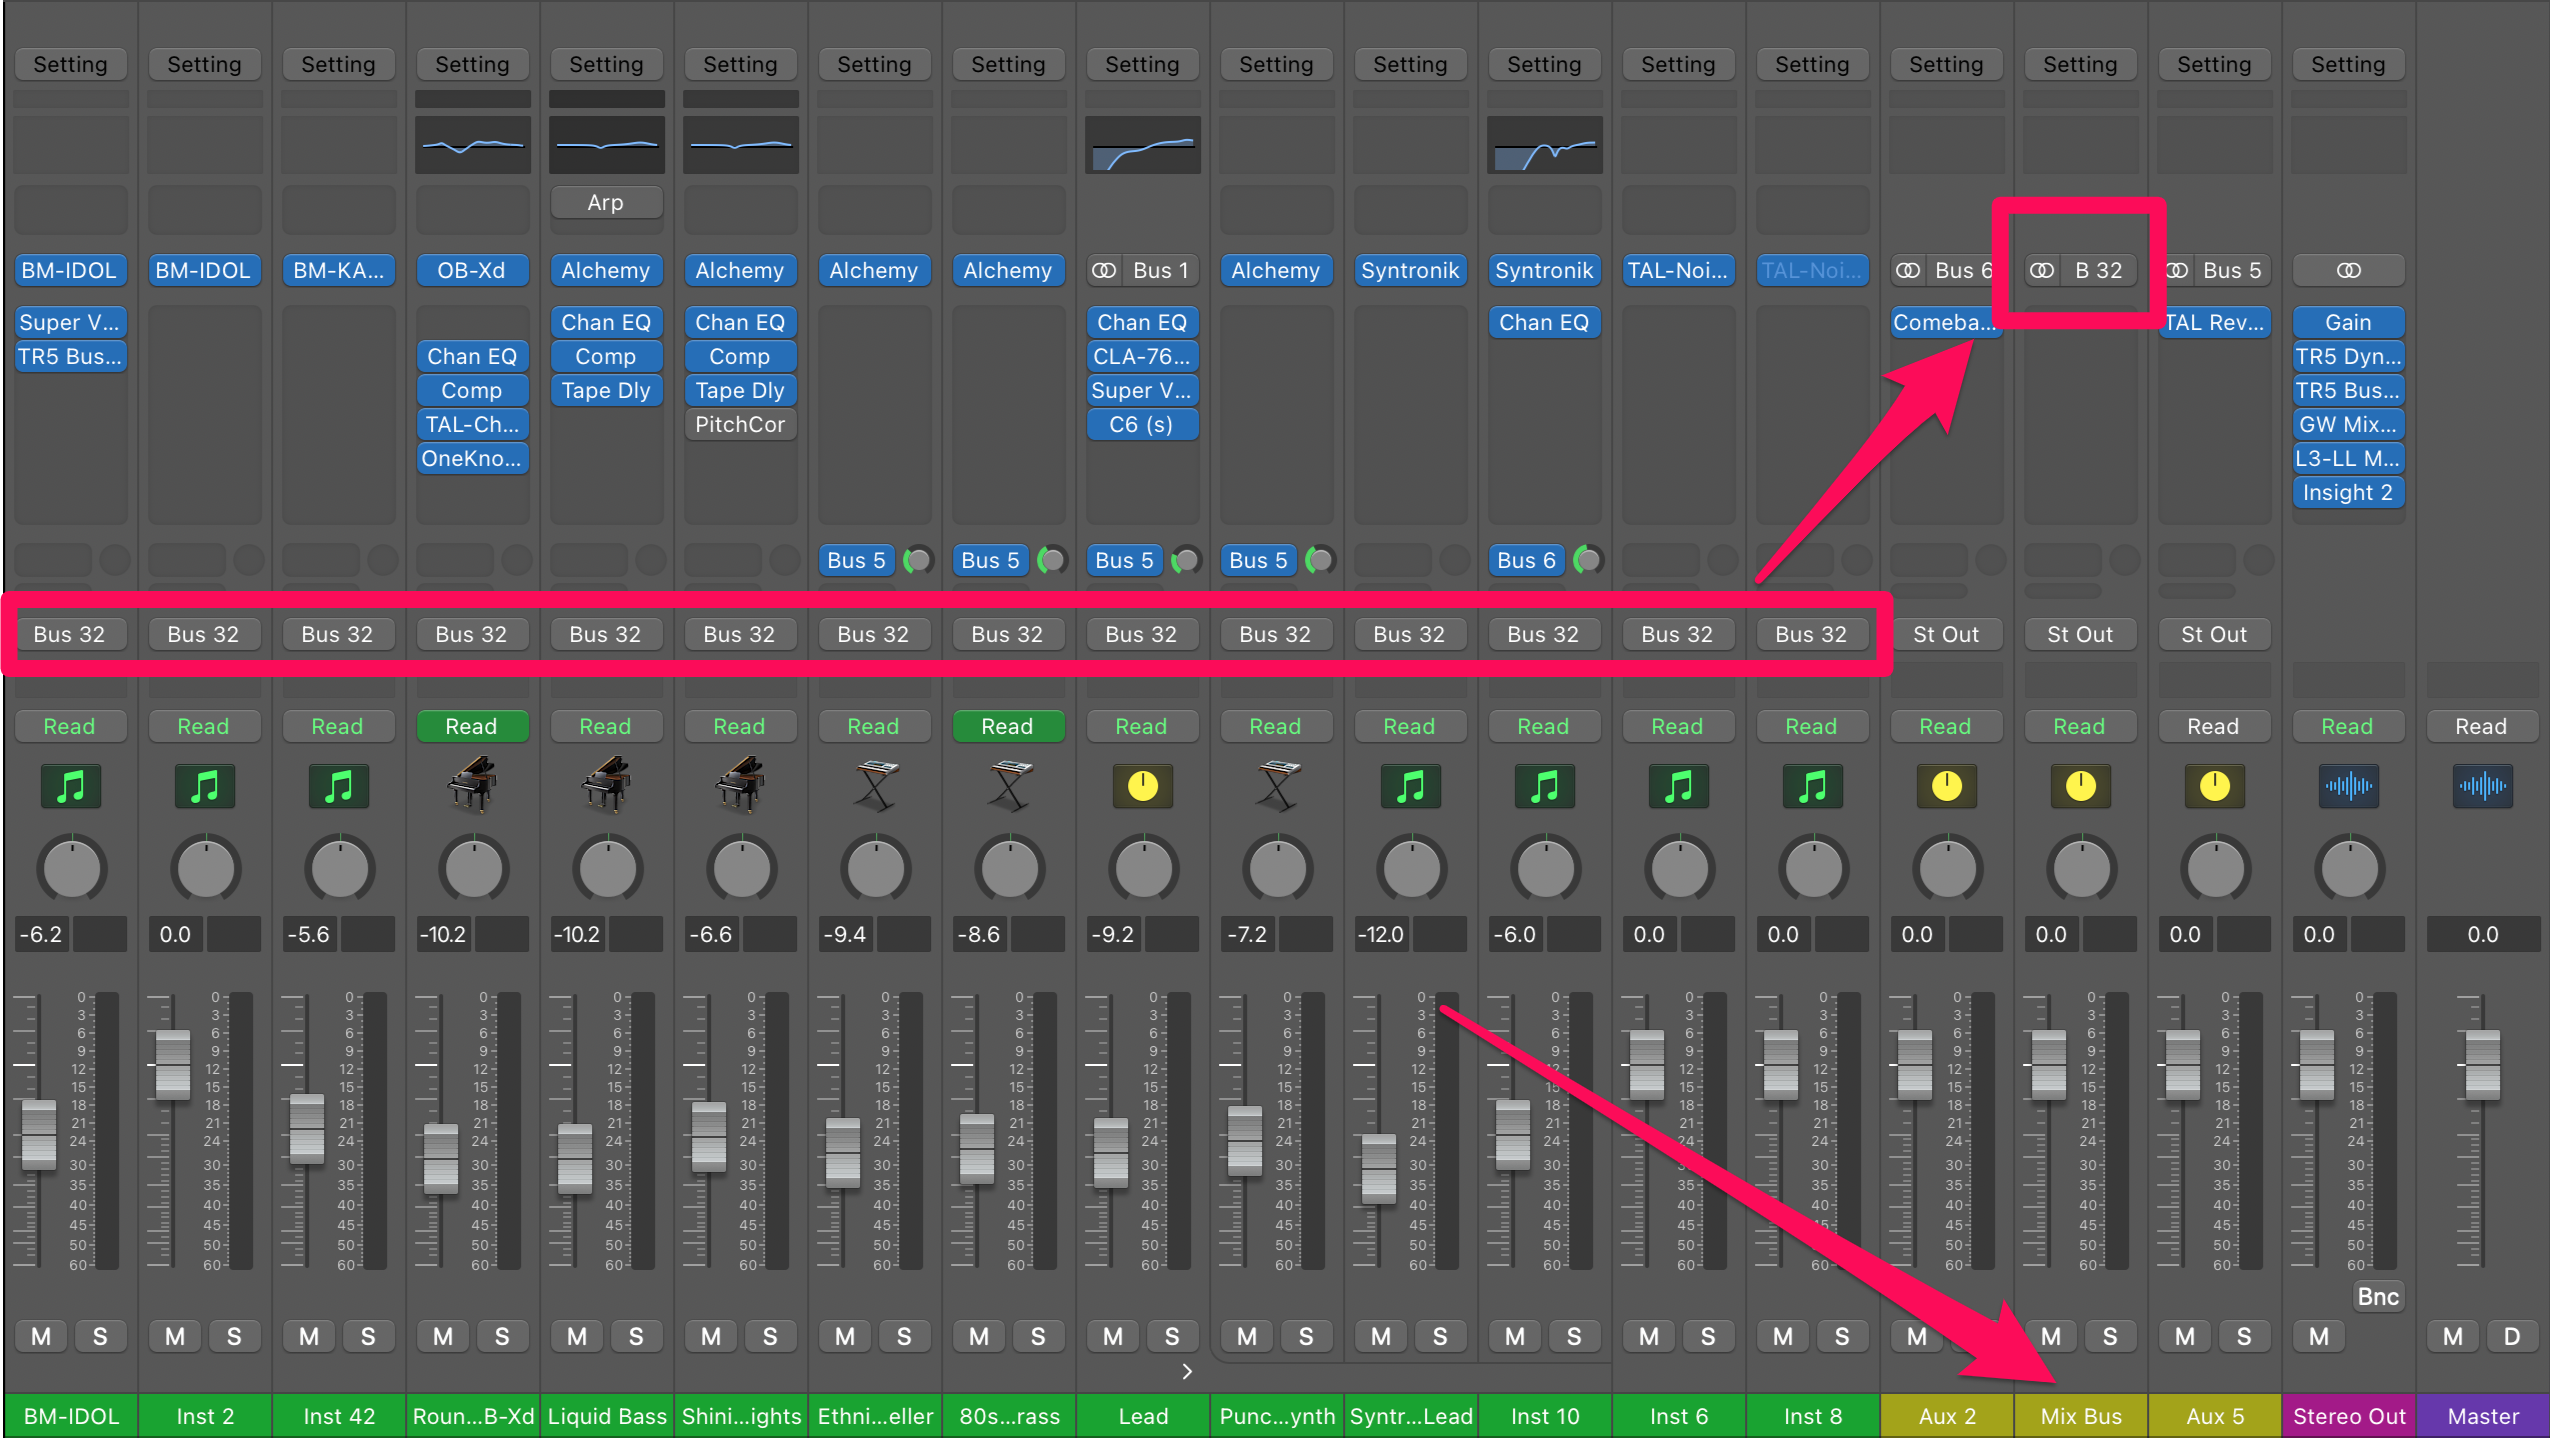
You then have to assign what bus you want this new Aux track to sit on. In the picture above, you can see I chose bus 32.
It doesn't matter what bus you choose.
Then you need to set the output of all of your tracks to be this new mix bus track, so I set the output to be bus 32 for each of my instrument tracks.
Now all of my tracks are going to my mix bus before hitting the stereo out (you can see the output of the mix bus feeds the stereo out).
Now if I want to add a reference track, I easily can, and I would just leave the output of the reference track to be the stereo out.
Best Mix Bus Chain For A Professional Mix
So what is the best mix bus chain for getting a professional mix?
Our goal is to create an upfront, cohesive, and wide mix.
The following mix bus plugin chain will help you achieve this.
1. Parametric EQ
I like to start with EQ because you are essentially deciding on the final frequency content when start with EQ on your mix bus.
In other words, you're basically making the final decision on what the building materials are going to be for your song.
Start by adding some parametric EQ. You'll want to add smooth and subtle EQ that adds powerful bass and silky-smooth highs to your track.
You'll want to compare your references to your EQ before making any boosting or cutting decisions.
Pay attention to the highs, lows, and mids of your references and how they compare to yours.
Do your references have more presence? Boost some highs.
Does your track sound too muddy in comparison? Cut some low mids or bass.
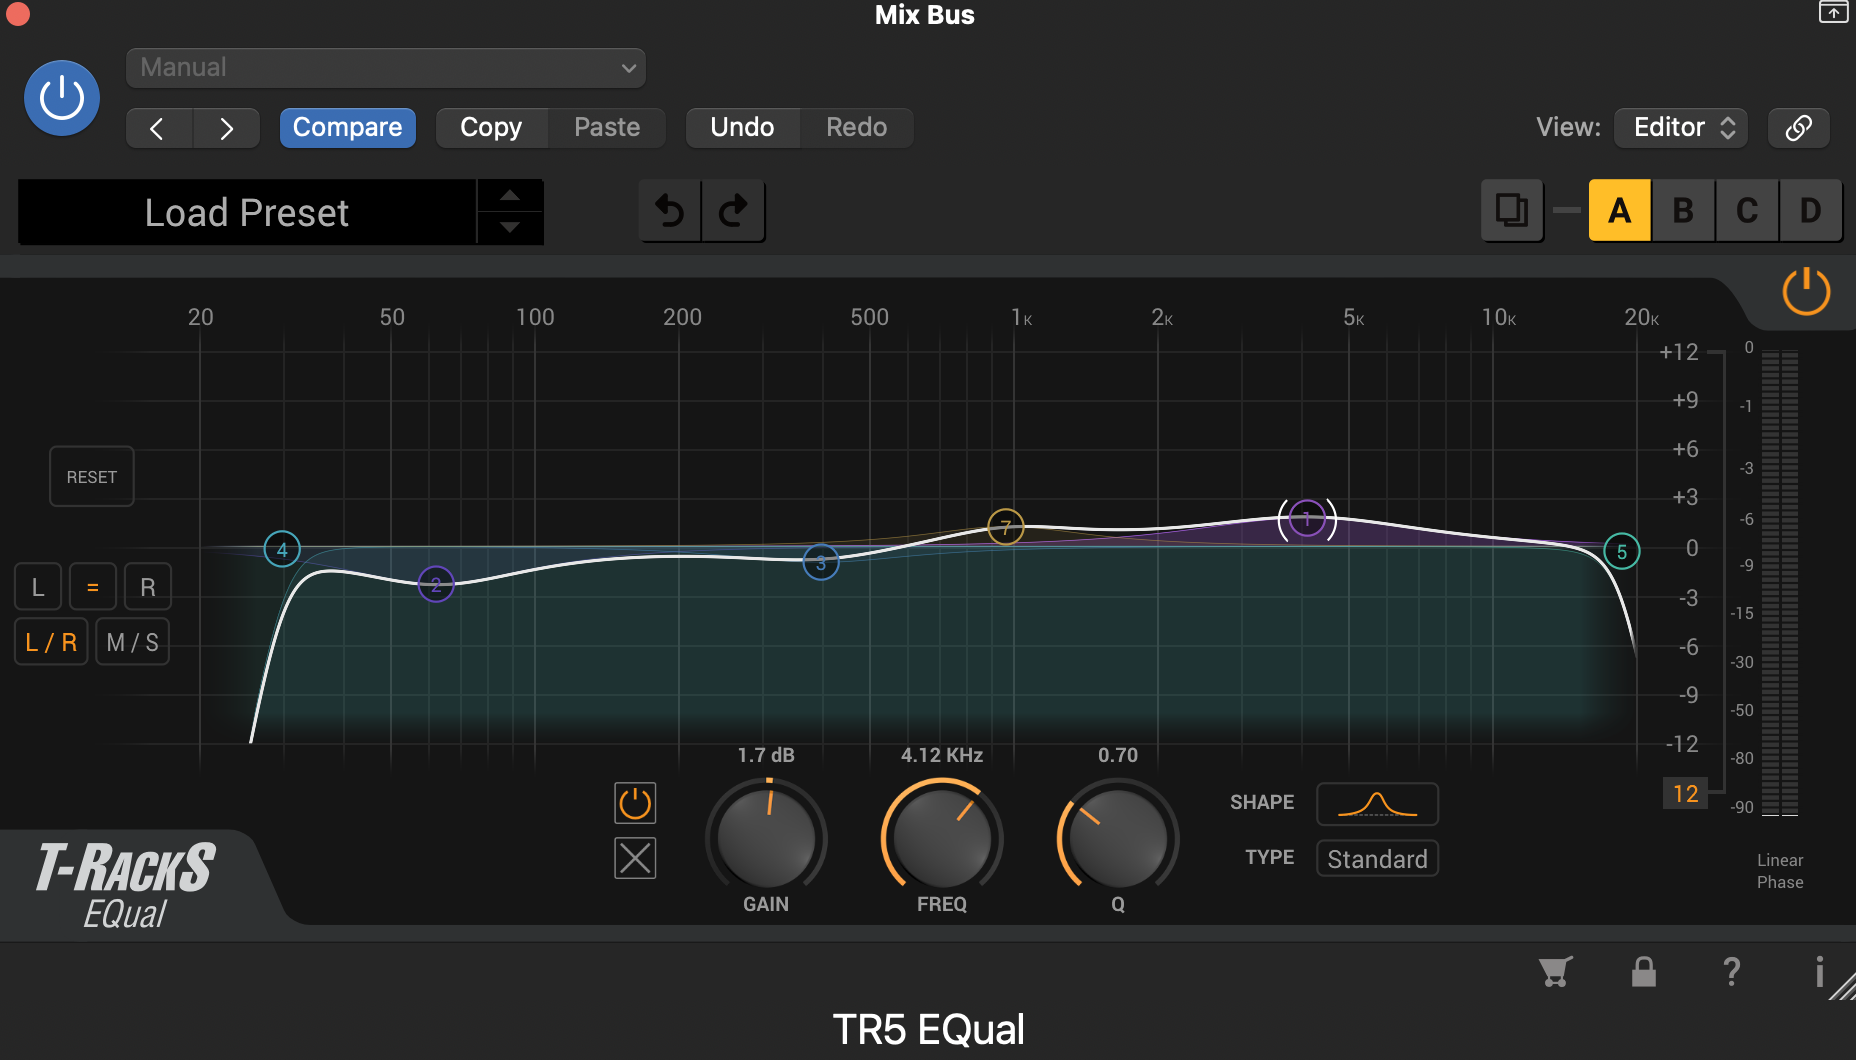
Here are the EQ moves I typically make:
Any other moves I make are to make the EQ curve of my song more closely match my references.
In general, you don't want to make any boosts or cuts above 2db. You want to be very subtle here.
That's it for the parametric EQ, now on to the mid-side EQ.
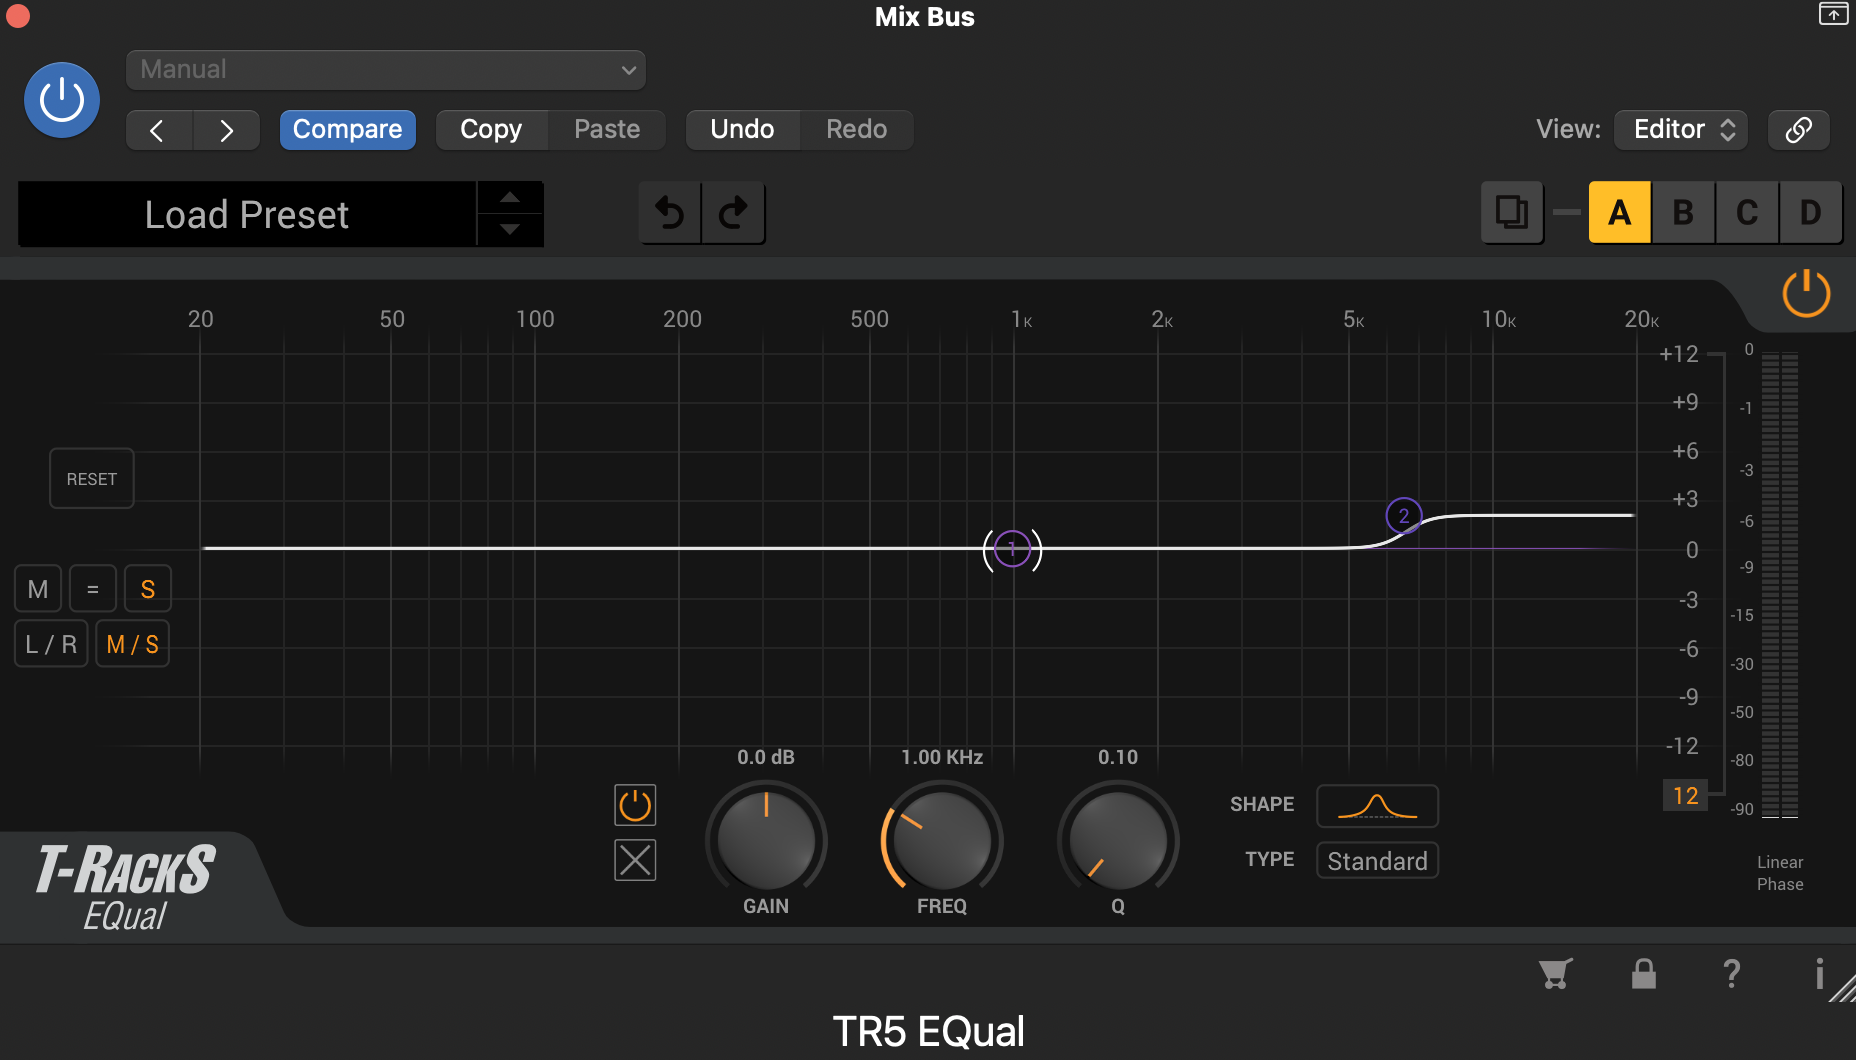
2. High Shelf Side EQ
You can also EQ the sounds in the middle of the stereo field differently than you EQ the sides.
I like to add a EQ high shelf to the sides, and boost 1 to 1.5db at around 8kHZ.
This will boost the highs in the left and right channels only, and provides a nice boost of air and space to your mix without increasing harshness like you would boosting the highs in the middle.
3. Compressor
The next plugin you'll want to insert is a compressor.
The goal with the compressor is to glue your mix together.
How to Glue Your Mix Together
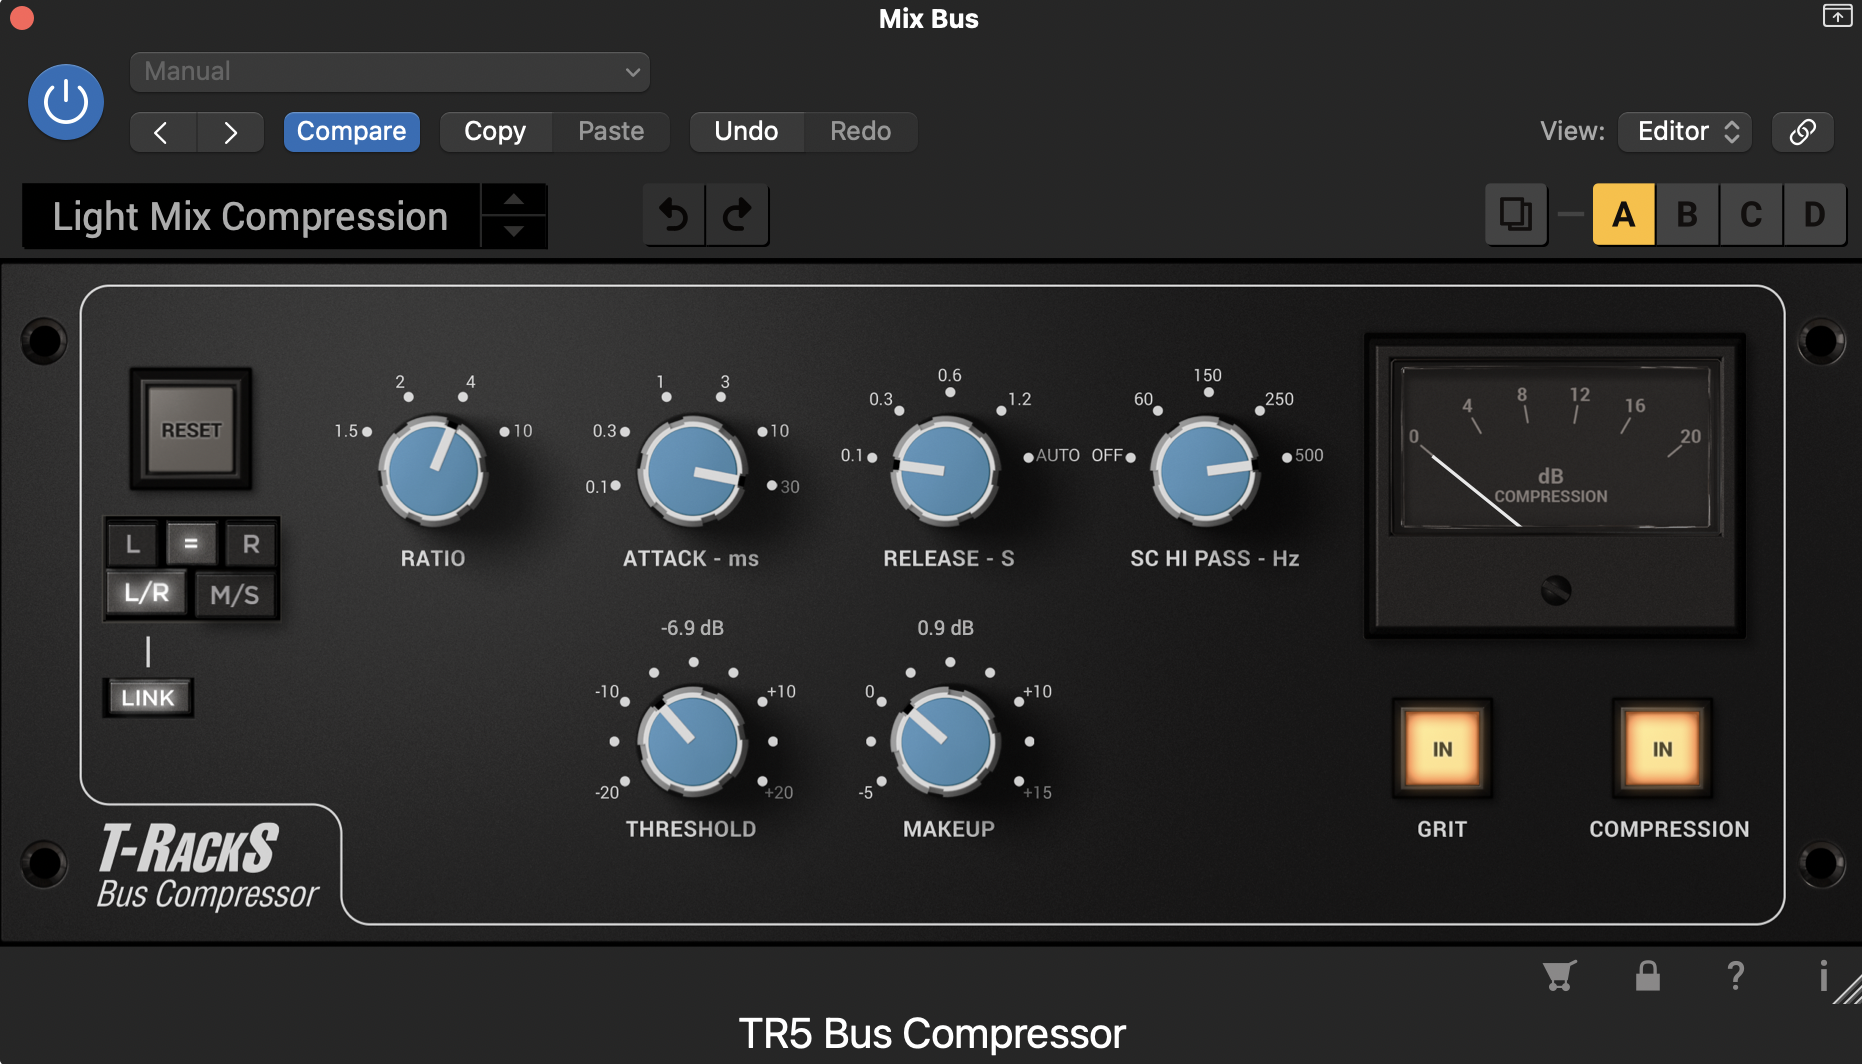
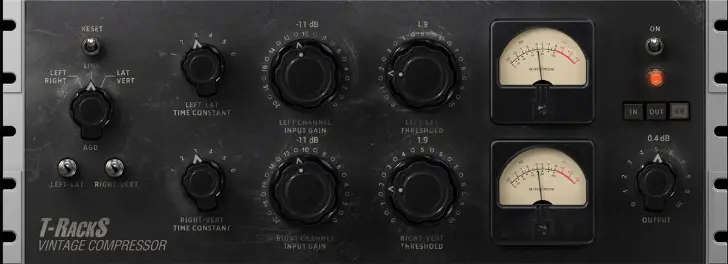
I recommend using a compressor that is built for gluing a track together, like IK Multimedia's Bus Compressor (pictured above).
This is a VCA compressor, which makes it great for blending your mix together.
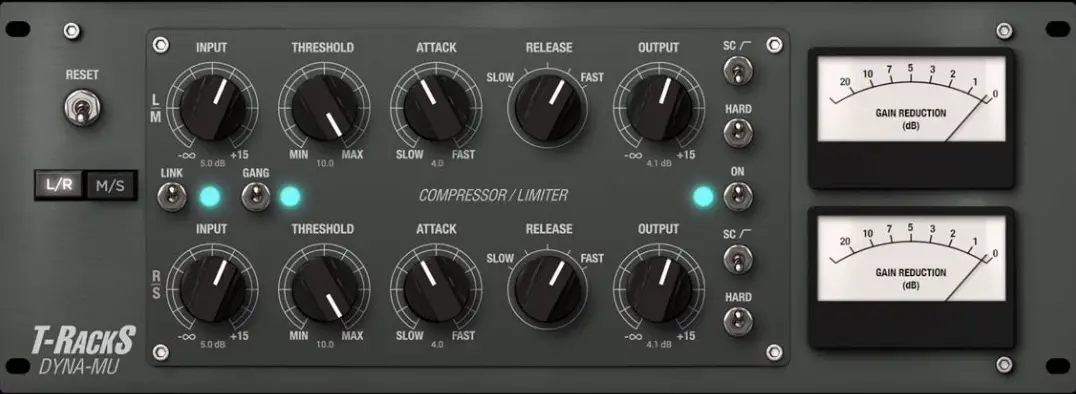
You could also use a Variable mu style (tube) to achieve the compression as well.
Tube compressors will introduce subtle harmonic distortion, and famous models include the Manley Vari-Mu and the Fairchild 670. Each will provide a warm, smooth sound.
Emulations of each of these compressors can be found below.
If you don't have any plugins that model these hardware compressors, that's okay. Just can also use whatever VCA or Tube compressor you have.
Consider testing each and seeing which one you like better.
Mix Bus Compressor Settings
What we're looking at here is a slower attack, and a medium release.
Too fast of a release will cause a "pumping" effect, and too slow will kill the dynamics.
So I would use the "auto" setting if you have it on your compressor, or else use your ears and adjust to taste.
This ensures a gentle and subtle level of compression so that you get the gluing effect you want, without squashing out all of the dynamics in your song.
4. Saturation
I also like to add some analog warmth to my tracks since I do everything "in the box" (i.e. in the computer and not with outboard gear).
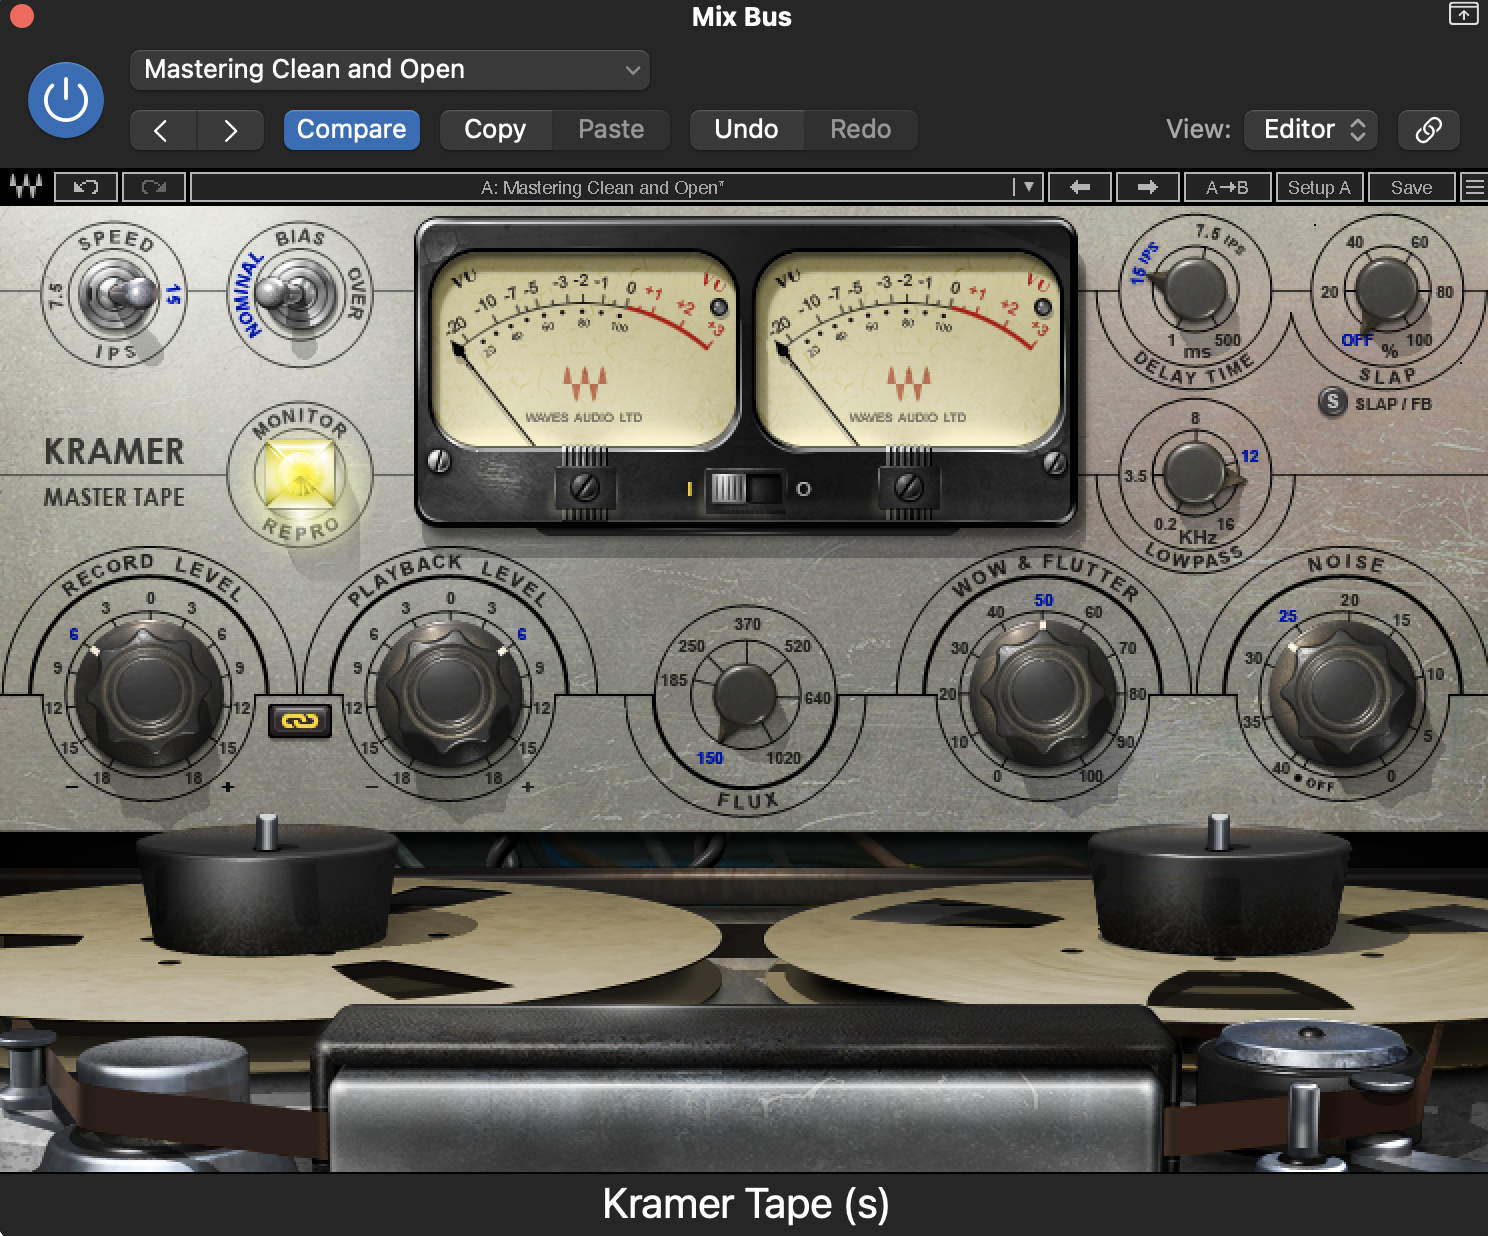
In the olden days, EVERYTHING was colored by tape saturation because songs were "cut" (recorded) to tape.
Since I make music that I want to have a more vintage vibe, I like to add some tape saturation to my mix bus sometimes with the Kramer Master Tape plugin.
If that's too extreme for you, you could just stick to your hardware modeled compressor.
So I guess I would say this is optional.
5. Harmonic Enhancer & Width
I love harmonic enhancers. You can basically just call these "sound gooder" tools.
You throw one on your mix bus and it just sounds better!
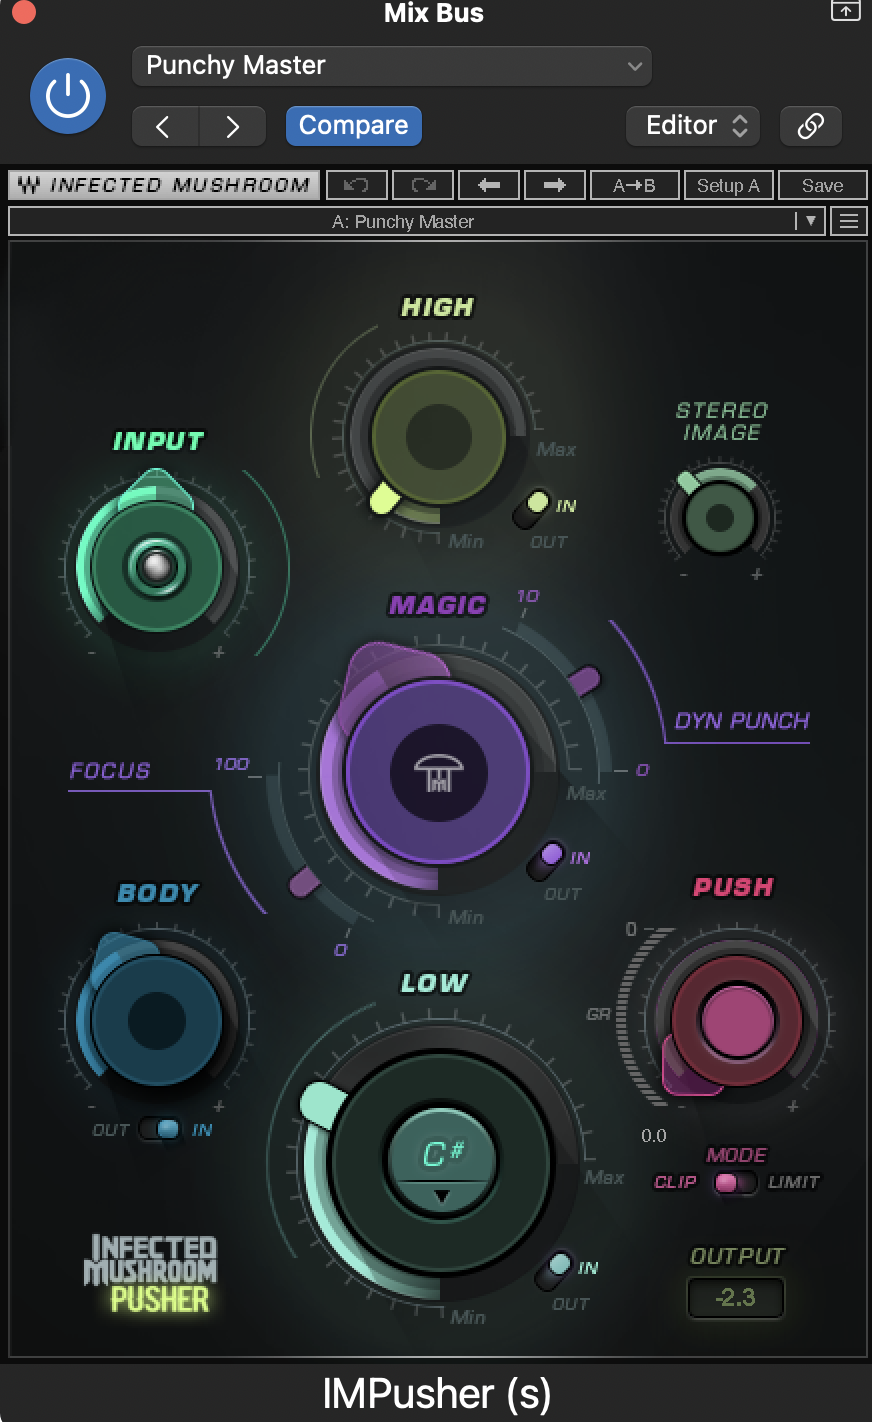
One of my favorites is the Infected Mushroom Pusher by Waves.
It works especially well on Electronic music.
Other great ones include Greg Wells Mix Centric, and Scheps Parallel Particles, both by Waves.
What a harmonic enhancer actually does is introduce new subtle frequency content to your track.
That's what the "Magic" knob does here in Pusher.
The result is more depth, punch, and brightness, without actually making your track louder.
Pusher also has a nice stereo image control to help you add some stereo width to your track.
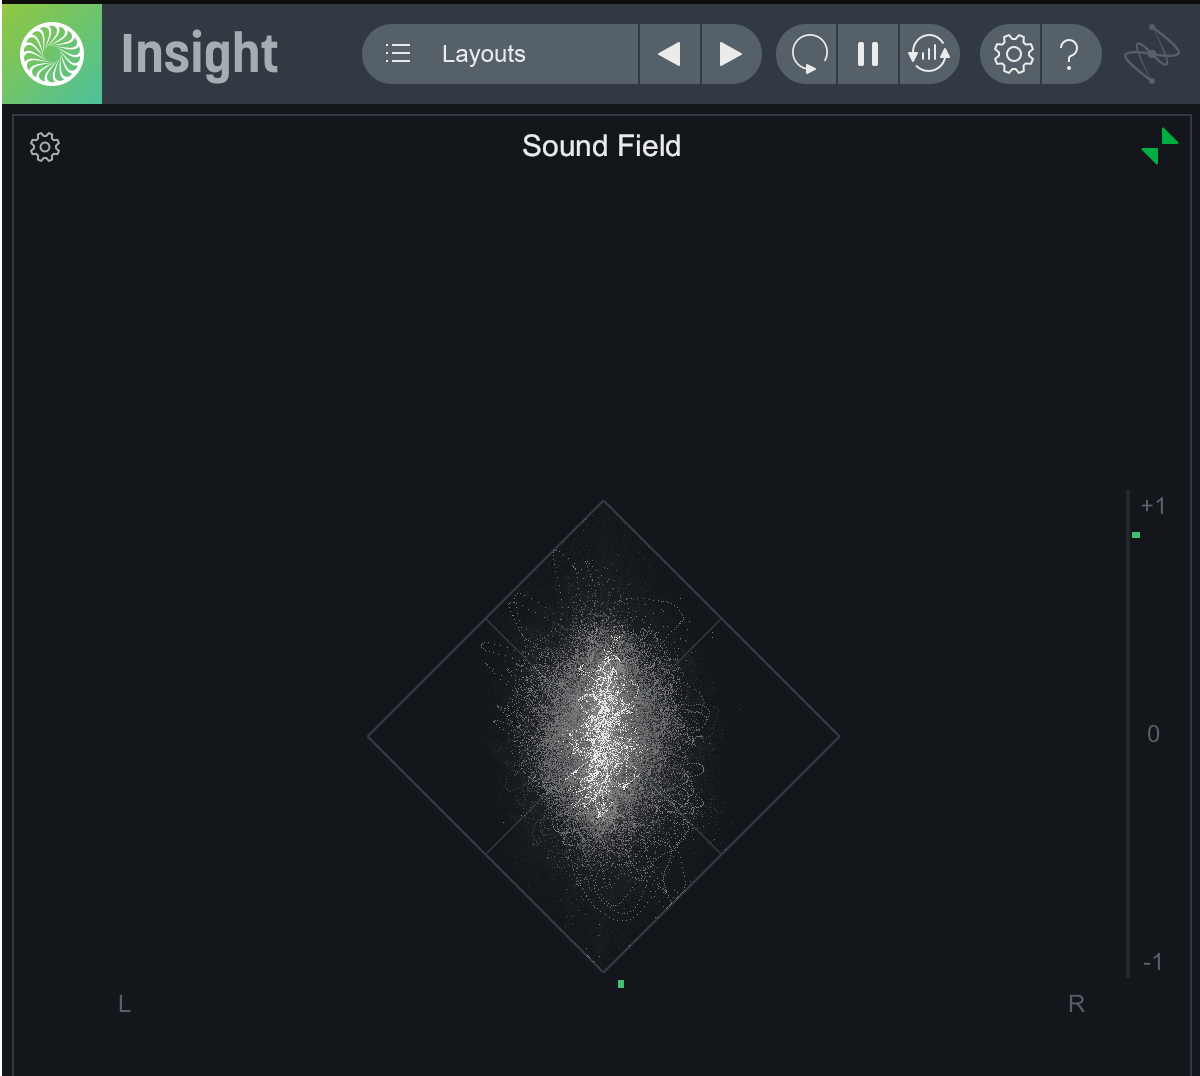
I would, however, be very cautious about adding much stereo widening to your mix bus, as this can cause phase issues.
This means sounds can start to cancel each other out, and you get an ugly sound.
It's better to use panning during mixing to create your width, and then be very careful with widening on your mix bus.
You can use a tool like iZotope Insight to make sure everything is in phase.
Also, when using your harmonic enhancer, be sure to adjust the output so that you aren't making your mix louder with this.
Mix Bus Before & After
I went ahead and threw this mix bus chain on one of my tracks so you can hear what all of these sound like together.
Watch my short video below to hear what my track sound like without any mix bus processing, and then what it sounds like after mix bus processing.
What Can And Cannot Go On A Mix Bus?
On a mix bus, we're looking to shape dynamics, tone, harmonics, and the mid-side content of a mix.
That means there are certain effects that can and cannot live on mix bus.
What can You Put On A mix bus?
Can
Should Not
I will say the exception to what you should not put on your mix bus is if you are wanting to create a cool effect at a certain part of your song.
If you are wanting to go for a degraded sound at a certain part of your song, it can be cool to add some pitch warbling across your whole mix, and then use automation to remove it.
Is The Mix Bus The Same As The Master Bus?
Technically, yes, the mix bus and master bus are the same thing, but for best results, you'll want to treat them as completely separate things.
After you have finished your mix, and bounced your track down to a single stereo track, you then can open a new project in your DAW to master your track via the "master bus".
This is if you are mastering your song yourself.
If you want to send your song to someone else for mastering, it's even more important to treat your mix and master bus differently.
This is because of the different volume levels you want your mix and master to have.
You want to leave headroom in your mix so that when you, or someone else, goes to master it, they have room to work.
The main difference here is that on your mix bus, you will NOT want to put any limiting.
Adding a limiter to get your track up to commercial volume levels is for the mastering phase.
Next Steps
Having a great mix bus chain can go a long way to creating that professional sound, but it's not a silver bullet.
It's only as good as how well you've recorded and mixed the tracks in your song.
If you want to learn a proven step-by-step process for mixing your track, start to finish, so you can publish more music, faster...

Create Better Songs, Faster
Click below to download my free song-finishing checklist to help you create radio-ready songs without taking months to complete them.
I hope you got value from this post on what is the best mix bus processing chain.
If so, feel free to share, and let me know in the comments below:

This mix bus settings works on the trap vocals+beat song?
Yes!
Of course, no song is like another song, so you will probably want to tweak some settings, and maybe add or change something for your unique song. But this is a great starting point for any song or genre.