

Are you mixing in a room with little to no acoustic treatment and it just sounds bad?
No worries, because that shouldn’t stop you from pumping out great mixes.
Every mix engineer, no matter the environment, must factor in the room.
Can You Get A Quality Mix In An Untreated Room?
My room is not perfectly tuned and treated, and that’s okay. You don’t need a perfectly treated room to create high quality mixes.
In the end, no room is 100% perfect. It’s impossible.
At the pro commercial recording studio I trained at, even that room was not perfect, and required a 3rd octave EQ in order to tune and calibrate the room.
Here’s what it looks like:
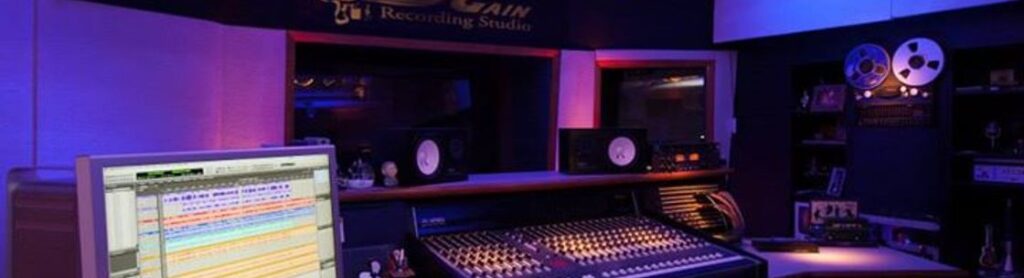
The room doesn’t have any walls or surfaces that are parallel to each other. Even the ceiling is angled, which means there are no standing waves, and no frequencies getting cancelled out.
Every surface is soft to absorb sound, and the room has a large accordion-style bass trap.
It’s as perfect as you can get, and yet, it’s still not perfect.
Sound will interact with everything in the room, from the walls to the floor and even people.
So you absolutely don’t need pro-treated tuned room to get high quality mixes. It helps a lot, but it’s not necessary.
There are some things you can do in your own, less-than-professional studio to create high quality mixes.
Here are 9 tips to help you get there…
1. Adjust Your Listening Position
Just making sure you are in the right location in your room can go a long way toward improving the sound of your room.
You’ll want to make sure that:
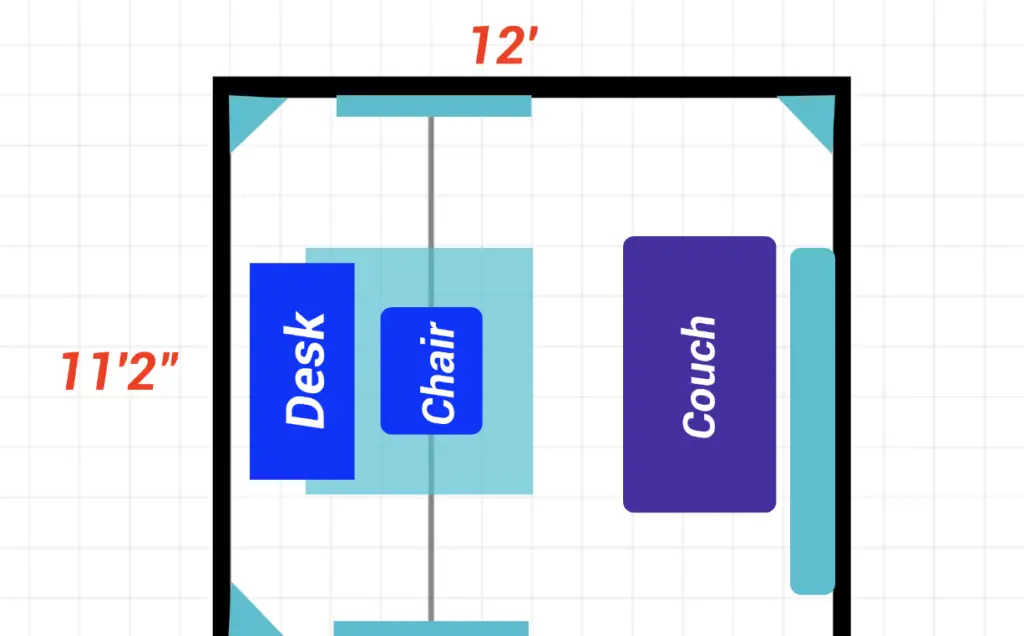
1. You are positioned length wise, in the middle of the side walls
You can see what I mean in the image above. If your room is rectangular, you’ll want your desk to be placed in front of one of the shorter walls.
However, you don’t actually want your desk right up against the wall.
2. Listening position is 33% from the front wall
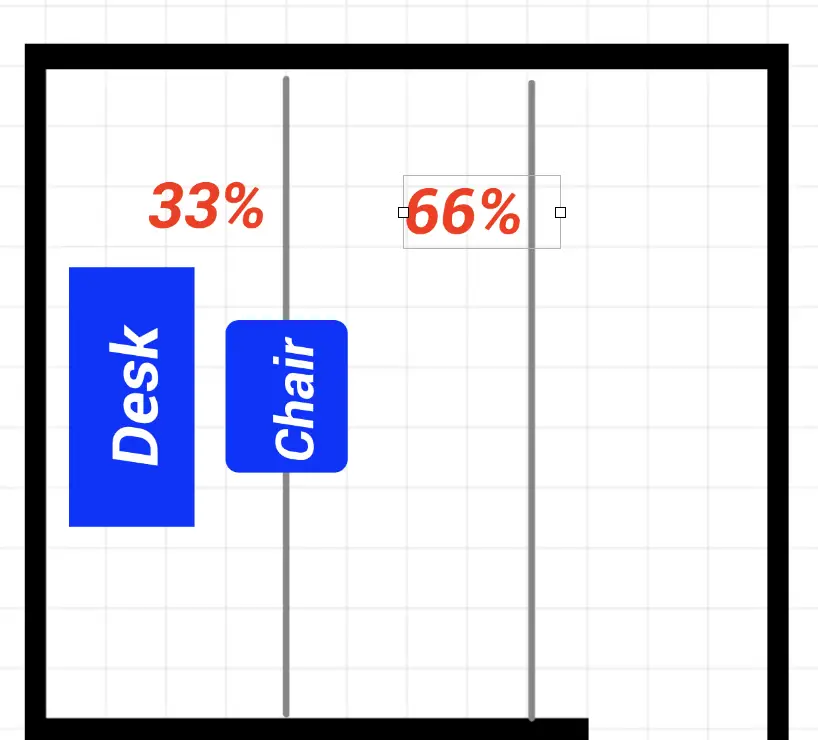
Basically, if you divide your room into thirds, you’ll want your listening position (where you sit in your chair) to be about a third of the way from the wall.
To achieve this, you’ll likely not want your desk to actually be up against the wall.
Instead, you’ll want to leave some room between the wall and your desk.
2. Adjust Your Speakers
Another thing you can do to instantly improve your listening environment is to make sure your speakers are positioned correctly.
You’ll want to make sure that your speakers:
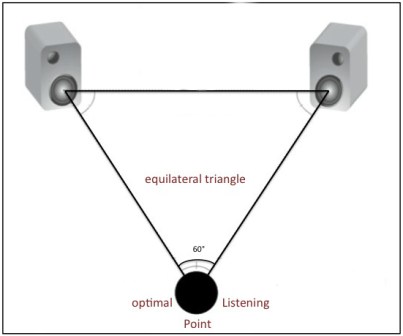
form an equilateral triangle with your head, and
- Form an equilateral triangle with your head
- Are the same height as your ears
- Are separated from your desk with foam, thick books, or speaker stands
- If your speakers are designed for this, positioned on their sides with tweeters out
By making these adjustments to your speakers, you’ll get a much more accurate picture of what you’re hearing.
3. Put Up Some Temporary Treatment
Another thing you can do to quickly improve your listening environment is to put up some temporary acoustic treatment in the form of blankets, pillows, cushions, or anything soft.
The first places you should treat are the walls on either side of your listening position, and the ceiling directly cover your listening position if that is possible.
This is because the first reflection points in your room are going to be the side walls right next to you, and the ceiling directly above your listening position.
By treating these areas first, you can absorb a lot of the reflections, and dramatically reduce the echo in your room.
4. Use The Right Speakers
Having the right speakers is also important, but you don’t need to shell out thousands of dollars for super high end studio monitors.
In fact, that would just be pointless if you don’t have a well treated room to put them in.
Most studio monitors aren’t going to work well in a small room or home studio.
That said, you do want to get speakers that::
- Have a linear frequency response (zero coloration)
- Are designed for use in a small (or any) environment, especially in home studios
The High-End Solution Without The High End Price
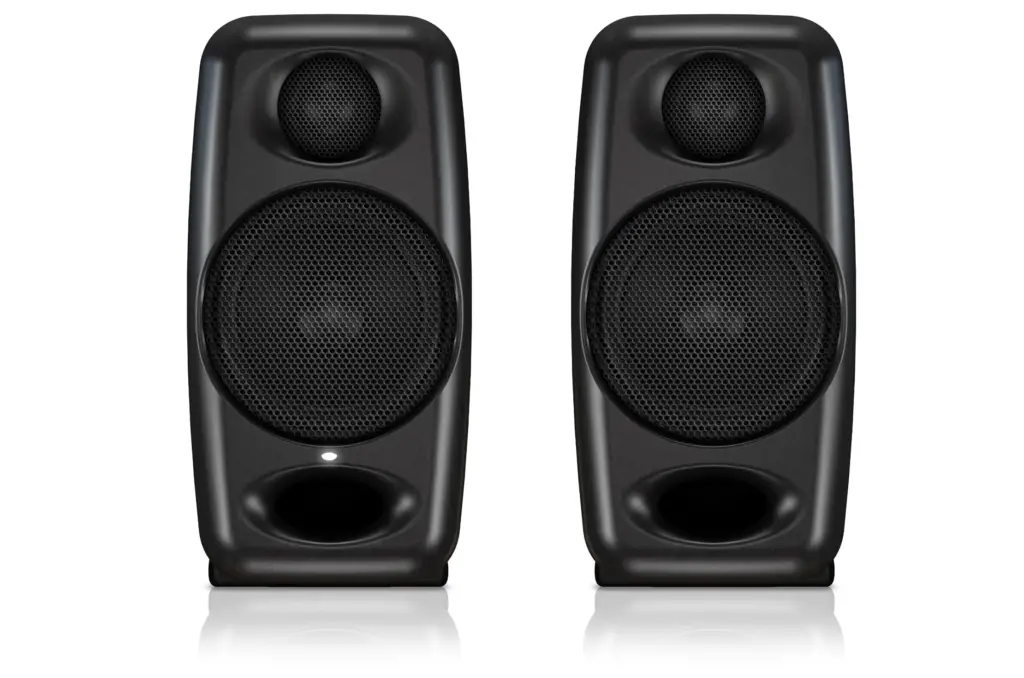
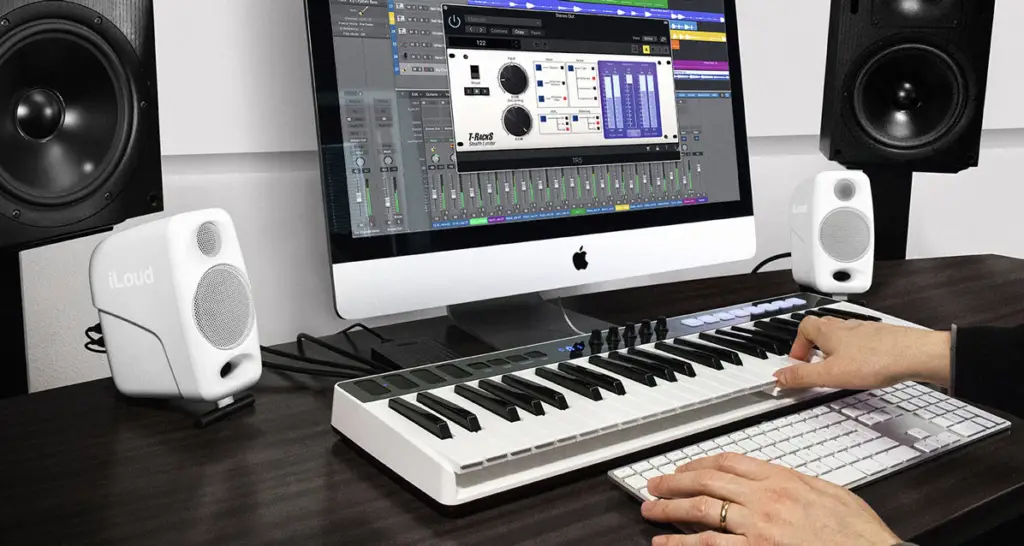
The best home studio monitors I’ve found are the iLoud Micro Monitors by IK Multimedia, as they are specifically designed for use in home studio environments (while also fitting in quite well in a pro studio).
iLoud Micro Monitor is two extremely portable, high-performance bi-amped speakers that delivers a combined 50W RMS of power for solid bass, plenty of headroom and a stunningly defined stereo image.
Whether you’re recording, editing, mixing or mastering audio, editing video, sound designing or gaming, iLoud Micro Monitor ensures your production will translate well to the huge variety of consumer devices — headphones, home stereo systems, gaming consoles, car audio systems, TVs, and other listening systems.
With iLoud Micro Monitor, you will hear the truth in your music no matter whether you’re mixing in your bedroom, mastering in a small studio or just listening to your favorite tunes at home.
And best of all, it offers high-end features that can be found only in monitors in big budget studios, but without the high-end price tag.
I absolutely love these monitors, and even use them when watching movies with my wife because they sound that good.
Don’t judge them by their size, because they pack a punch, but do so in a linear and truthful way.
If you want to see of video of me unboxing these speakers, just check it out below:
5. Turn Down Your Speakers
Another thing you can do to limit the impact of your room is to keep your speakers at a low volume.
Even if you were in a professional studio this is a good idea because it decreases listening fatigue.
Much like wind, sound is a physical force that you can’t see.
The more sound you pump into the room, the more it’s going to interact with your room, bounce around, and trick your ears.
You’ll just have a higher sound pressure level exerted on your ears, which can tire them out and make you less objective as you’re mixing.
So listen at a volume level where you could have a normal conversation with someone next to you without raising your voice.
That said, there is one KEY situation where you’ll want to listen back to your mix at a loud volume level.
6. Check Your Mix On Headphones

Having a decent pair of studio headphones is going to be vital for you in a poor mixing environment.
I would actually say these will probably be more important for you than monitors, because your monitors are really only as good as your room.
When you mix on headphones, you’re completely eliminating the sound of your room!
Now, mixing ONLY on headphones is not ideal either, so it’s really best if you could have both speakers and monitors so that you can test your mix in on two difference sources to make sure your own track.
So get a great pair of headphones first, then invest in some affordable (and appropriately sized) studio monitors like the iLoud Micro Monitors I mention above.
By checking your mix on headphones, you receive three benefits:
- You remove the room from your mix for a few minutes
- You can make fine tuning mix decisions with more accuracy
- It acts likes a second set of speakers with its own EQ curve which “wakes up” your ears
Once you’ve gotten your mix where you want it on your monitors, switching over to headphones can really help you go those extra few miles that you need to to put together a professional-sounding mix since you’re dealing with a bad room.
You can also more easily hear minute details and fix small and undesirable sounds.
And of course, by having “fresh” ears and hearing your mix in a new environment can help you to notice things you didn’t before.
But what kind of headphones should you use?
7. Use Pro References
This might be the most important tip yet, and it’s something you should consider using from the very beginning of your mixing process…
Using two to three pro mixes as references.
By dropping in a couple of professional-quality tracks into your DAW, you can uses these as guides as you go about making mixing decisions.
Pick songs that are similar in instrumentation or genre to use as your references, and then see how their various parts compare to your song.
For example, listen for:
- Does your song have a lot more bass or mud in comparison?
- Are the references brighter or more present than your song?
- How do the references handle panning?
- How loud is the kick and snare in comparison to your song?
- Etc…
The reason using references is so key is because you’ll be listening to these pro tracks on the same speakers in the same room that you’re mixing your song.
For example, say you feel like your song doesn’t have enough bass, but if it compares well with the references, then you’re probably good, and it’s just the room tricking you.
Of course, it’s important to keep in mind that you don’t want to try and copy the references. We’re just looking for coming relatively close to the frequency/EQ curve of the references.
Your song is going to be different, so you might want to make your instruments, panning, or frequency content slightly different than your references.
But by having references, you can overcome the obstacle of a bad room.
Having references is the difference between asking to draw your house from memory versus a photograph.
The drawing made using the photograph is always going to be better than the one without.
8. Calibrate Your Room With EQ Software
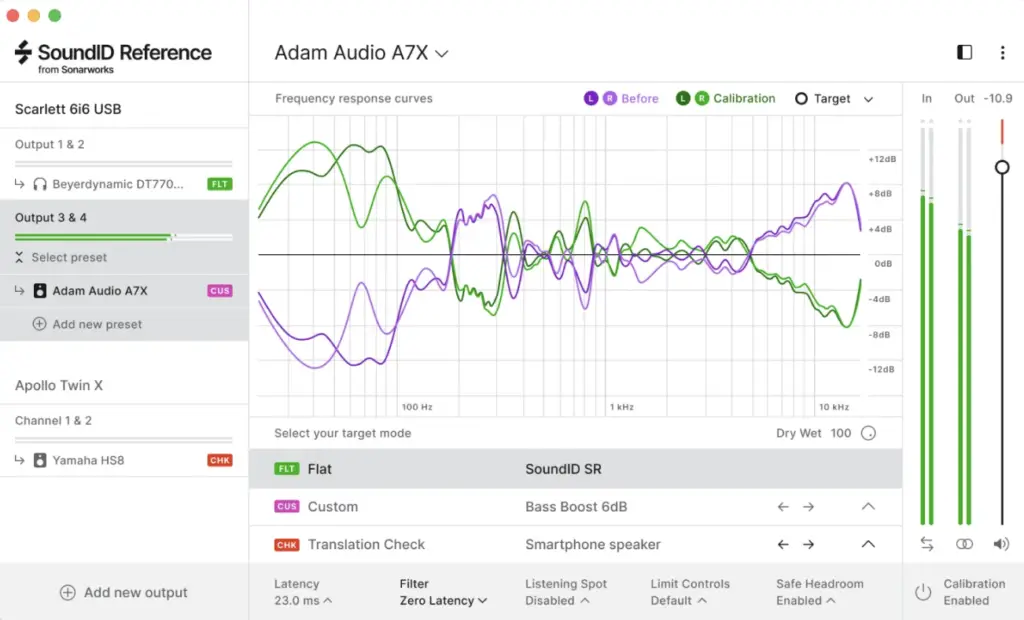
Another thing you can do to ensure you’re getting the most accurate picture from your speakers and headphones is to use a tool like Sonarworks to calibrate your room.
Sonarworks will determine the EQ curve of your room or speakers, and then correct this faulty EQ curve with a much more linear curve.
This helps you to:
- Create music that sounds great across multiple devices such as phones, laptops, earbuds, etc.
- Finish tracks faster by making better decisions and spending less time fixing mistakes
- Work from anywhere, as you’ll have the same flat consistent sound wherever you go
9. Turn Your Headphones Into A Pro Studio

Alternatively, you could also turn your headphones into a pro studio environment with Waves NX.
This plugin recreates the acoustics of a high-end studio inside your headphones, so you can make great mixing decisions anytime, anywhere.
Nx lets you mix and monitor with greater confidence, giving you a better representation of how your headphone mixes will translate to speakers.
Insert the plugin on your master bus, and hear all the elements of your mix accurately laid out in space, just as you would in the sweet spot of a great-sounding professional mix room.
Finish More Songs, Faster
By implementing these strategies, you can mix with more confidence, and finish more songs faster.
However, another huge bottleneck to finishing more tracks is not having step-by-step a mixing process or system.
If you want proven process for cracking out professional, radio-ready songs quickly…
Then grab my rapid mix finishing checklist here.

Create Better Songs, Faster
Click below to download my free song-finishing checklist to help you create radio-ready songs without taking months to complete them.
I hope you found this post valuable on how to mix in a bad room.
If so, feel free to share, and let me know in the comments below…
