How exactly do you go about equalizing vocals?
This guide will walk you through how to EQ vocals in 3 simple steps...
And share some bonus techniques you can use to shape the tone of your vocals.
How To EQ Vocals
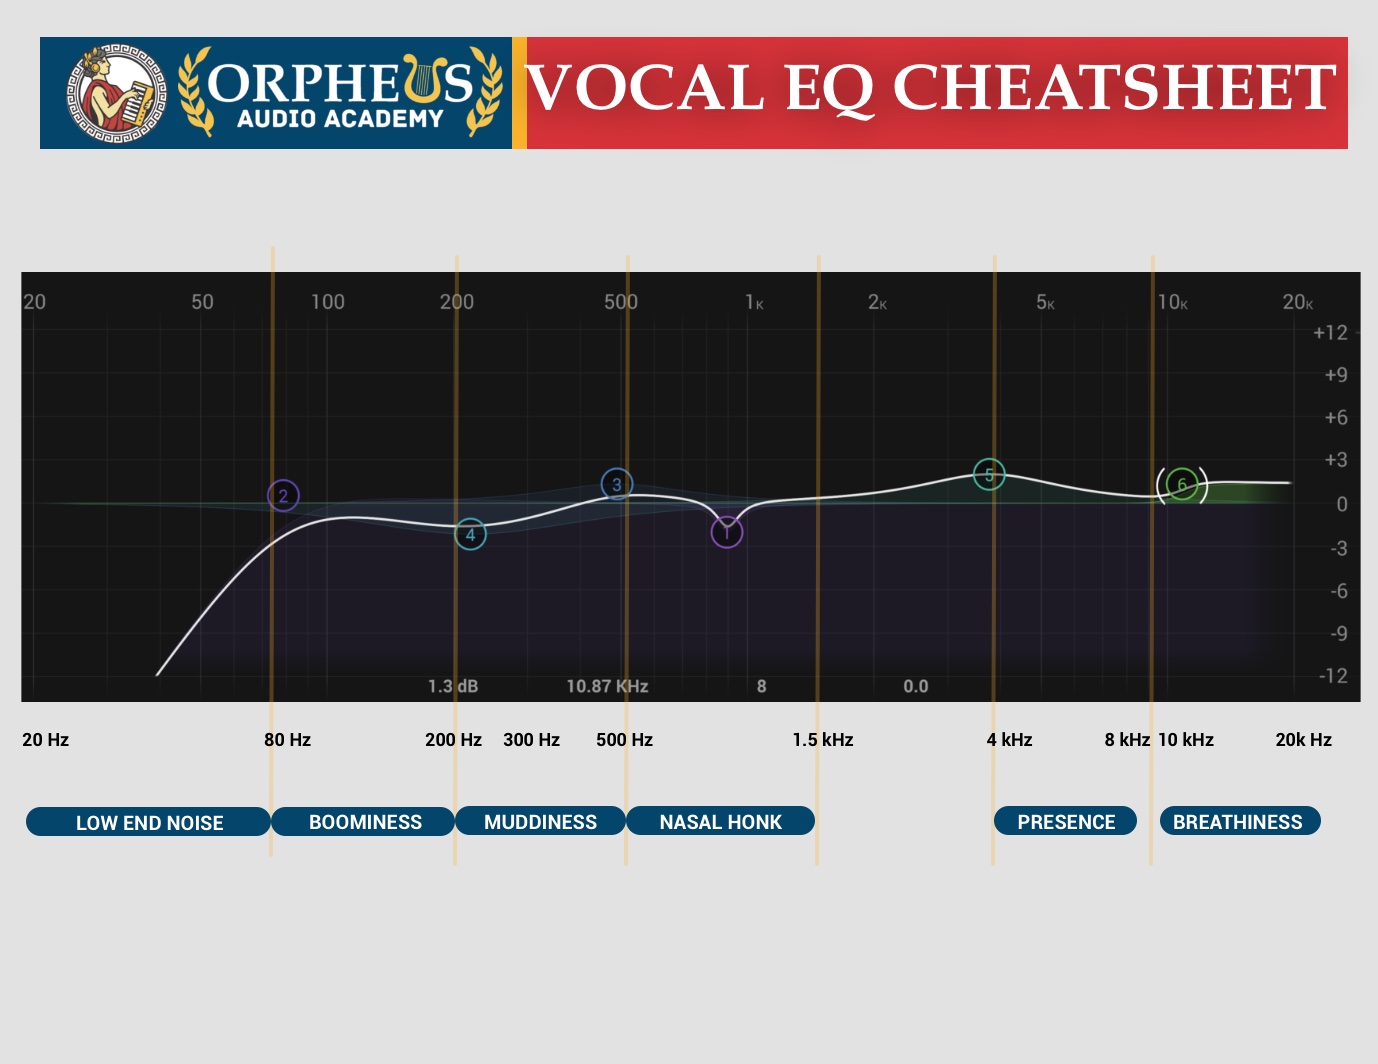
Here are some good steps to get you started with EQing vocals:
- Roll off the low-end starting around 80 Hz.
- Cut the mud around 250 Hz.
- Add a high shelf around 9 kHz.
- Add a presence boost around 2-6 kHz.
- Reduce sibilance around 5 kHz to 10 kHz.
Here are some good rules of thumb to keep in mind...
Make The Best Vocal Recording You Can
You can't polish trash, so make sure that you're recording the best and cleanest possible vocal you can.
If you need help with this, check out my article here.
It breaks down how to record professional-quality vocals from home, even if you have an untreated room.
Read: How To Record Professional Vocals in An Untreated Room
Cut Before You Boost
It's always best if you can cut before you boost. You may find that simply by cutting the frequencies you don't like it allows the good parts to shine through.
However, if you just set about boosting everything, then you can end up with an unbalanced, harsh, or brittle vocal.
So always try cutting first before adding in some boosts. Speaking of cutting and boosting...
Avoid Boosting Or Cutting More Than 5 dB
Try not to make any giant boosts or cuts, and keep your adjustments to 5 dB or under.
When you make huge boosts or cuts, it can make your vocal sound unnatural.
Of course, if that's what you're going for, great! There really is no wrong or right when it comes to mixing.
Okay, now let's jump into specific EQ moves you can make...

Create Better Songs, Faster
Click below to download my free song-finishing checklist to help you create radio-ready songs without taking months to complete them.
1. Add A High Pass Filter (HPF)
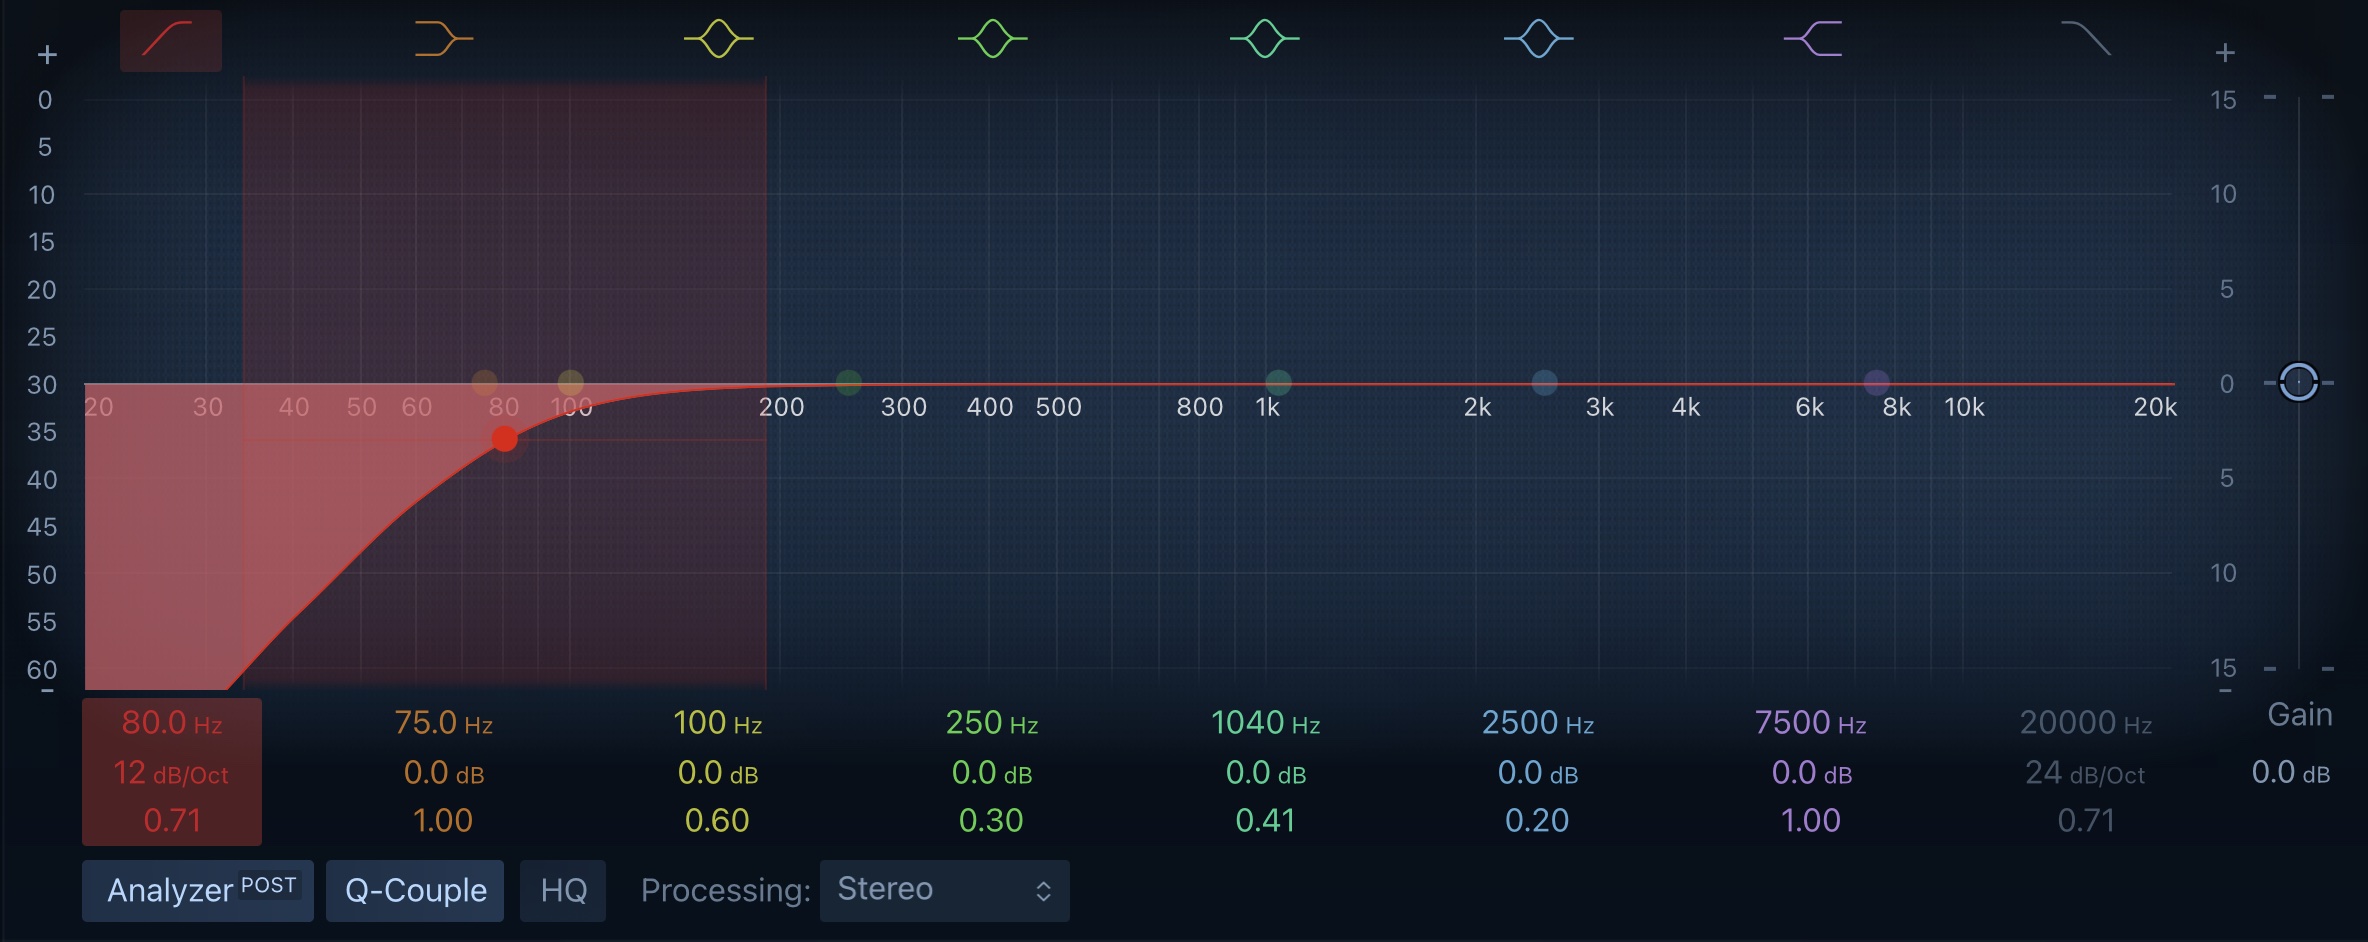
Adding a high pass filter (HPF) on vocals is a good idea because it removes the unneeded bass frequencies.
Starting Settings: Set the main frequency around 80-90 Hz with a 12 to 24 dB per octave roll off. Keep the Q at 0.71 to prevent a boost at the point of the roll off.
Next, move the curve up the frequency spectrum until you start to notice it taking away from the vocal. Once you notice the vocal being impacted, move it back down the spectrum until you the vocal sounds normal again.
This is a good spot to leave the HPF.
By itself, you might not even be able to hear any frequencies in the range that the filter is cutting out, but there is likely still some low frequency information here in the form of background noise or lower frequency harmonics from the voice.
When you add compression to the vocals, that low frequency content will be made louder, which can muddy up the vocals, and lead to a less distinct low end for your song as a whole.
This is why I HPF just about all of my tracks except my bass and kick.
2. Remove Muddiness & Boominess
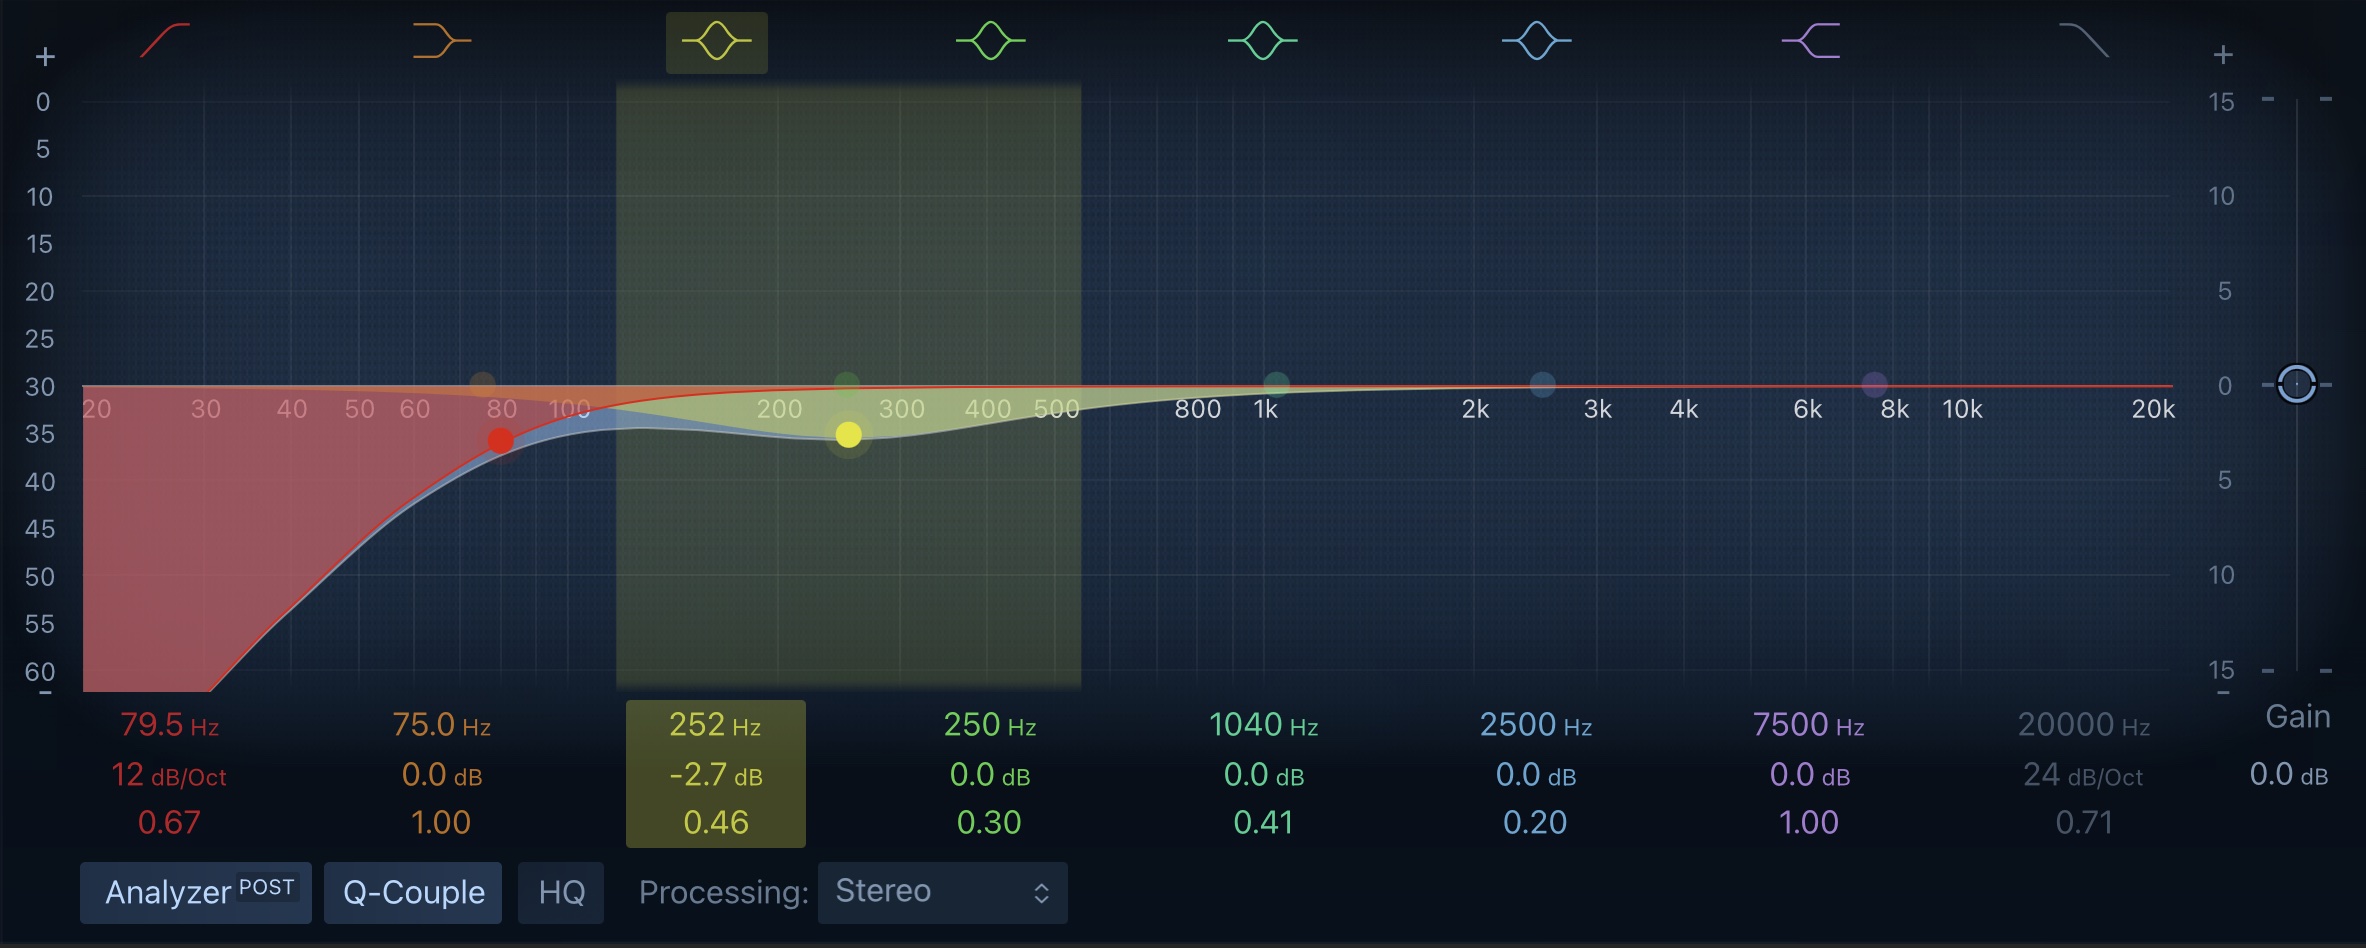
Next, you'll likely want to cut out some of the low mids of the vocal. If you are listening to the vocal soloed, then this might actually make the vocal sound worse.
But when the vocal is mixed in with the rest of the tracks, having this extra low-mid content can cause the vocal to lose clarity.
Which is why avoiding the solo button when EQ is one of the best ways to instantly improve your mixing.
Here's how to remove muddiness and boominess from your vocal:
- Set the main frequency around 250 Hz with a Q at about 250 Hz.
- Sharply boost the frequency to "hunt" for the problem frequencies (ones that sound the muddiest or boomiest).
- Cut this frequency range by 3-5 dB.
3. Add Presence & Air
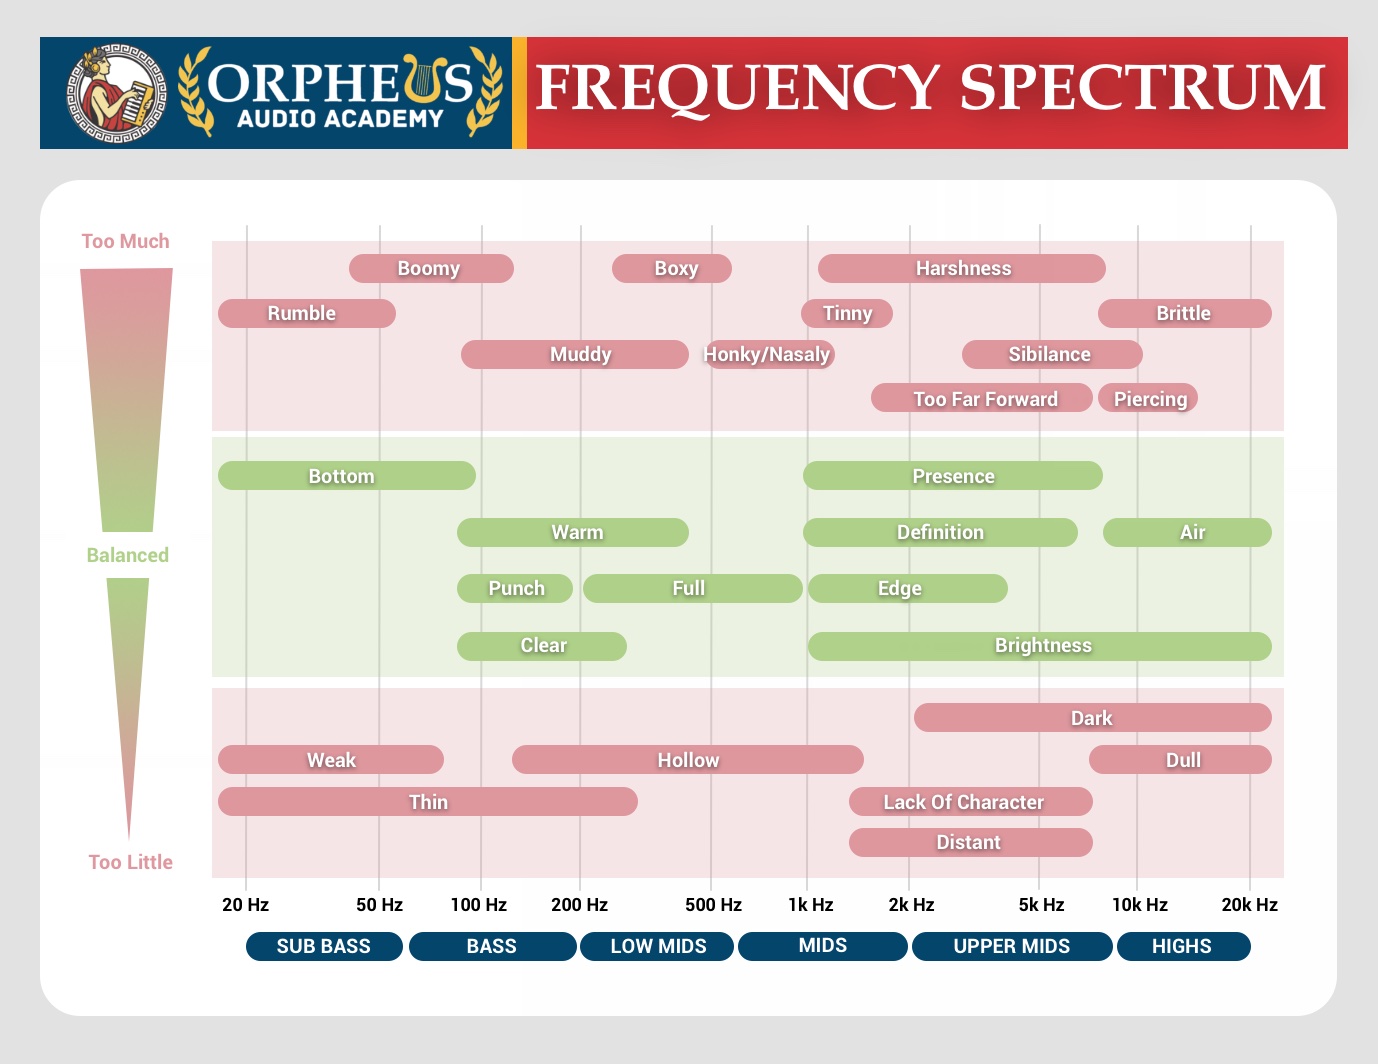
Adding Presence
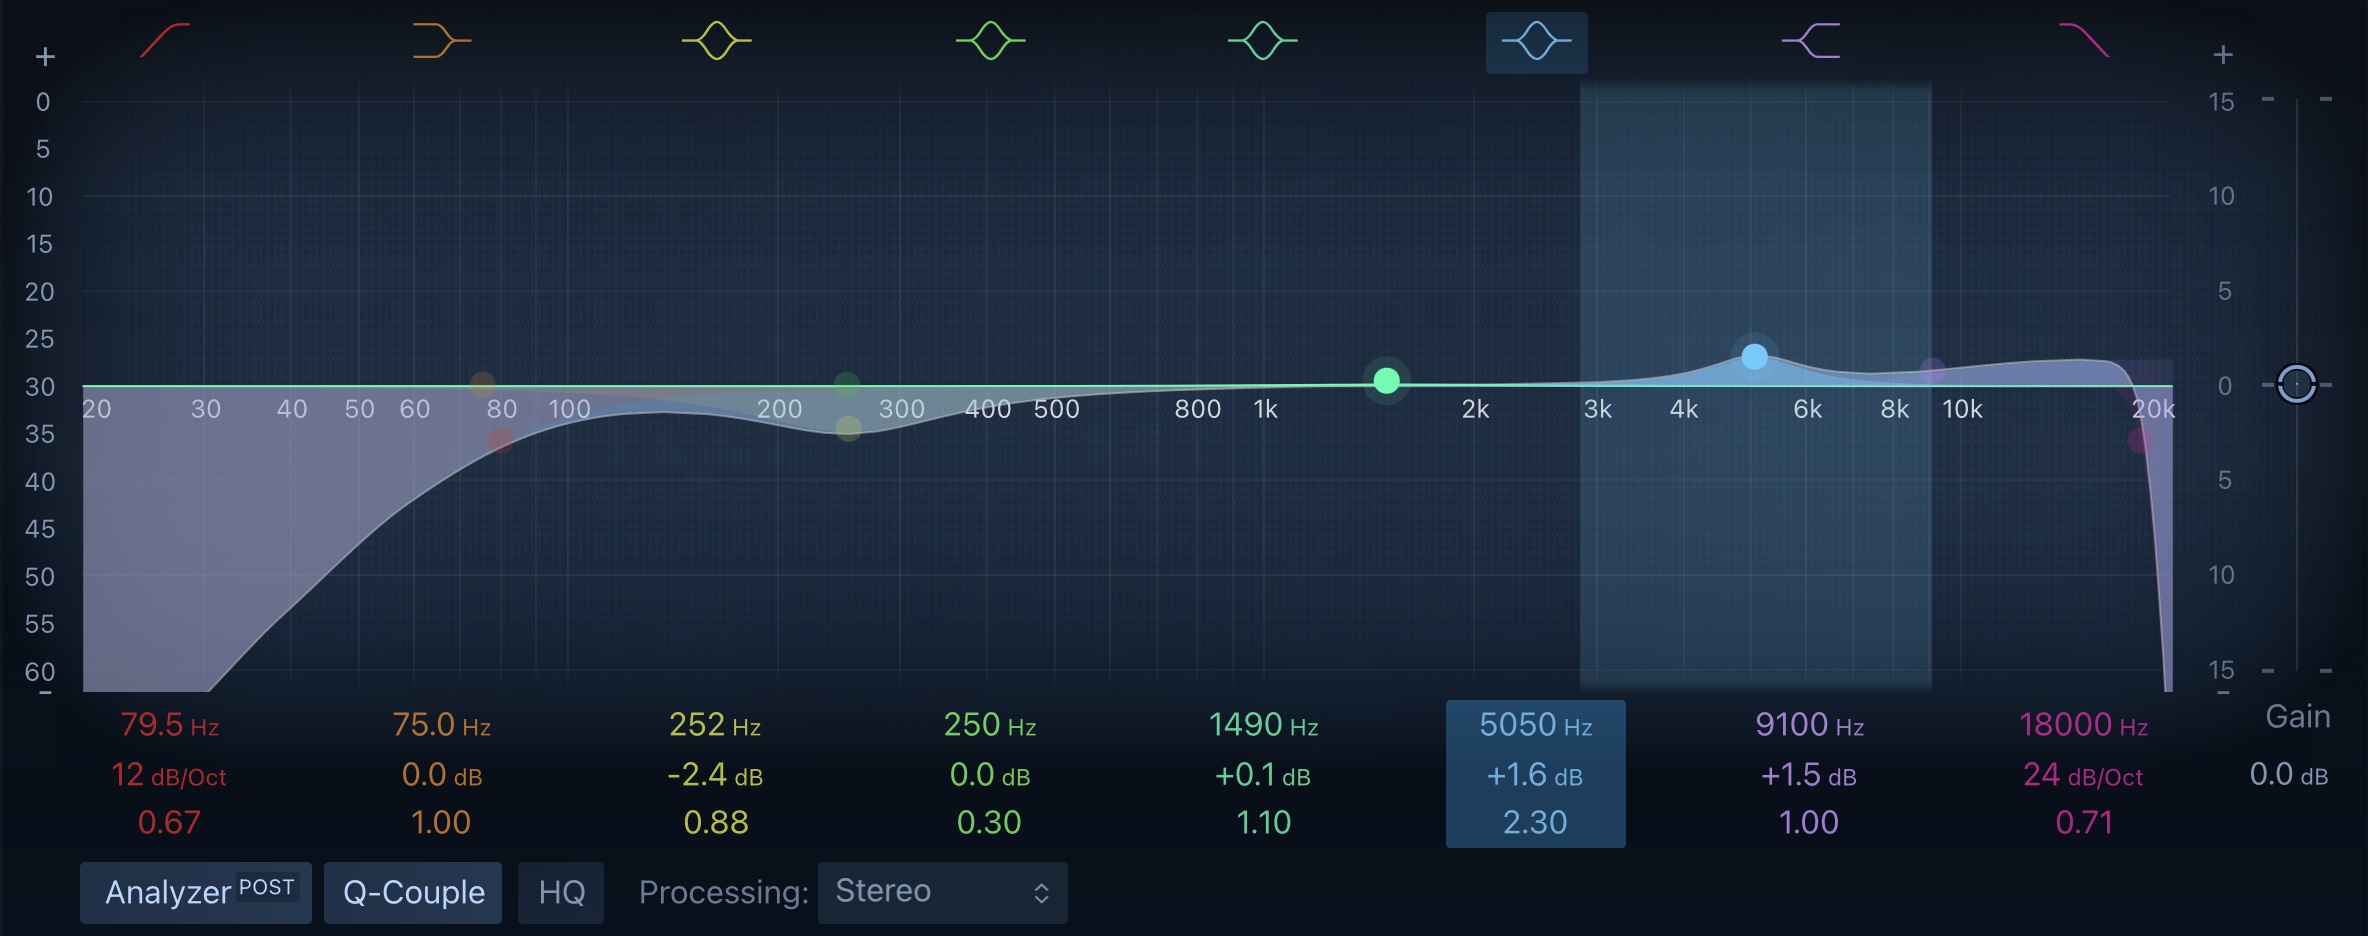
To improve the clarity of your vocals, you'll likely want to add in some presence, which is roughly in the 4-6 kHz range.
- Start at 5 kHz
- "Hunt" for the sweet spot by moving up and down the spectrum
- Boost by 2-3 dB
- Set a Q point between 2 and 3.
Adding Air
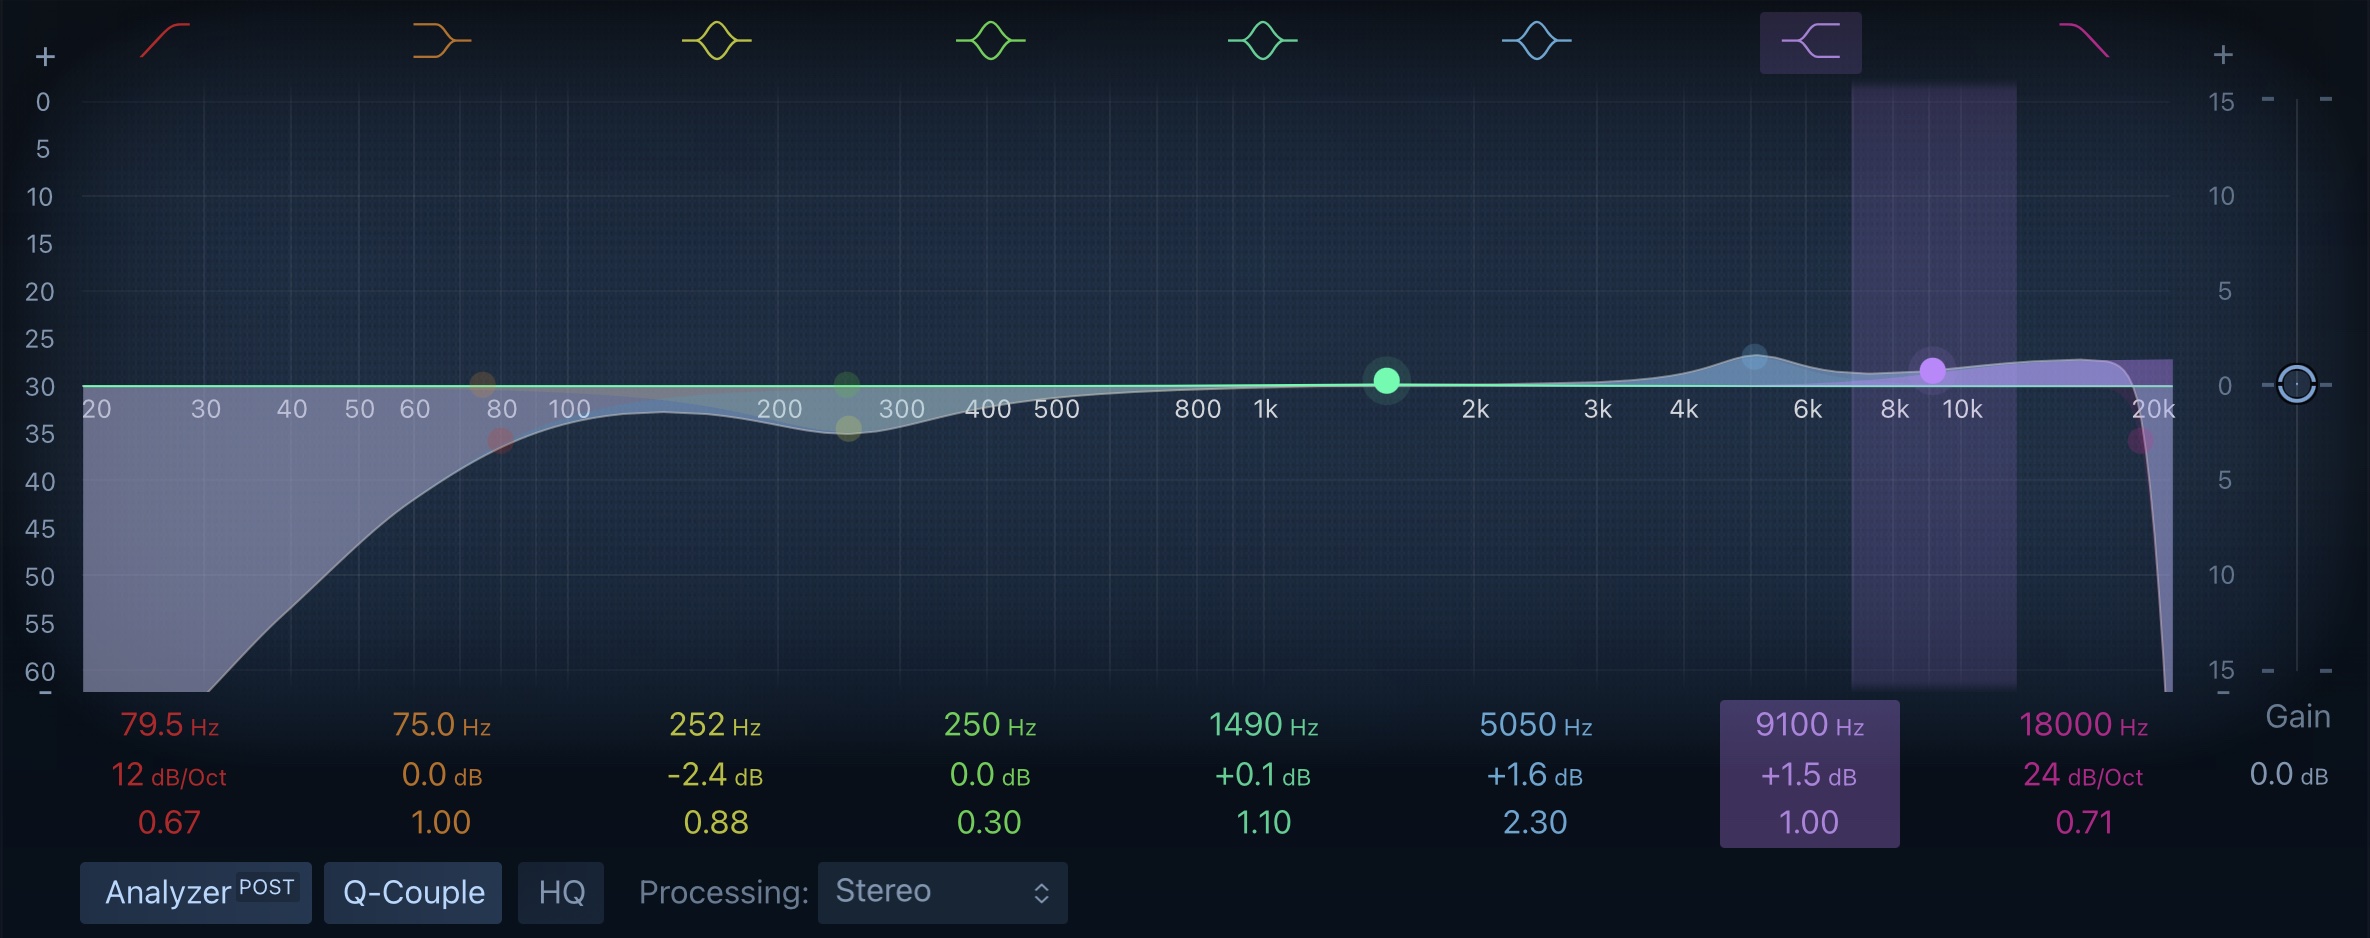
Next, you can add some air and sheen to your vocals by boosting the high frequency range above 10 kHz.
However, you'll want to be very subtle. If you boost too much, the vocal can sound harsh, brittle, and increase listener fatigue.
To counter making the vocal too sharp, you can also add a low pass filter (LPF) to cut off the very extremely high frequencies
- High shelf boost around 8-10 kHz
- Boost 1-2 dB
- Roll off the highs at around 18 kHz
When EQing vocals, always remember that every voice is unique.
For example, if you want help specifically with EQing female vocals, then check out my article here.
Bonus: Use A De-Esser To Reduce Sibilance
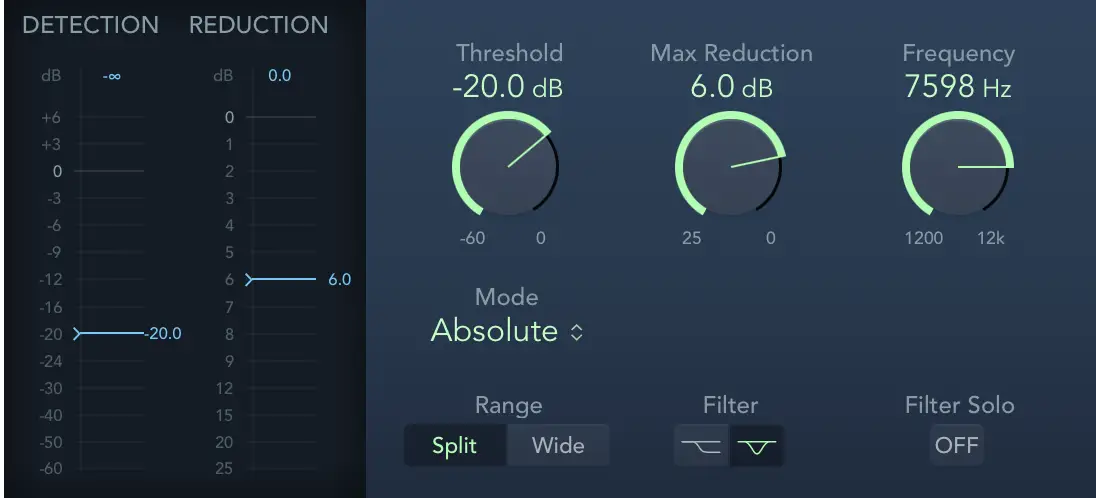
A De-Esser is actually a compressor that uses frequency rather than gain as its input, so not EQ related.
But you may find as you boost your presence of your vocals, they start to sound too harsh, especially on the "S" sounds/words in your song. This is known as sibilance.
You can use a De-Esser to turn down the volume of JUST those harsh frequencies in the vocal, ONLY when they get to be too loud.
To set this up, throw a De-Esser plugin on your vocals.
- First hunt for the problem frequency range (the frequencies where the harshest sibilance is (usually 5 to 10 kHz)
- Set the threshold between -20 and -30 dB
- Set the volume reduction to around 6 - 12 dB (too much will make your vocalist sound like they have a lisp)
Vocal EQ Frequency Asked Questions

Have more questions about EQing vocals? Below are some of the more frequently asked ones...
Do you NEED To EQ Vocals?
Ideally, you would record a vocal so well with such a good microphone that you wouldn't need to EQ it at all. That said, even in professional studios, most vocals end up needing some EQ to help the raw vocal fit in the mix.
So long story short, you probably do need to EQ your vocals if want them to sound clear, audible, and professional.
How Do You Fix Nasal-Sounding Vocals
Nasally frequencies can be found in the 500 Hz to 1.5 kHz range, so try cutting these frequencies to remove the harsh nasal sound from your vocals.
How Do You Make A Vocal Sound Closer?
To make a vocal sound closer, you add an EQ boost in the high mids, around 5 kHz. Additionally, you can add some compression with a slow attack and a fast release.
For an in-depth guide on how to make your vocals sound closer, read my article here.
How Do You Add Warmth To Vocals?
For a warmer vocal sound, you could try subtly boosting the low mids, but there is a danger of making the vocal too muddy if you do this.
Alternatively, you could also try adding some saturation.
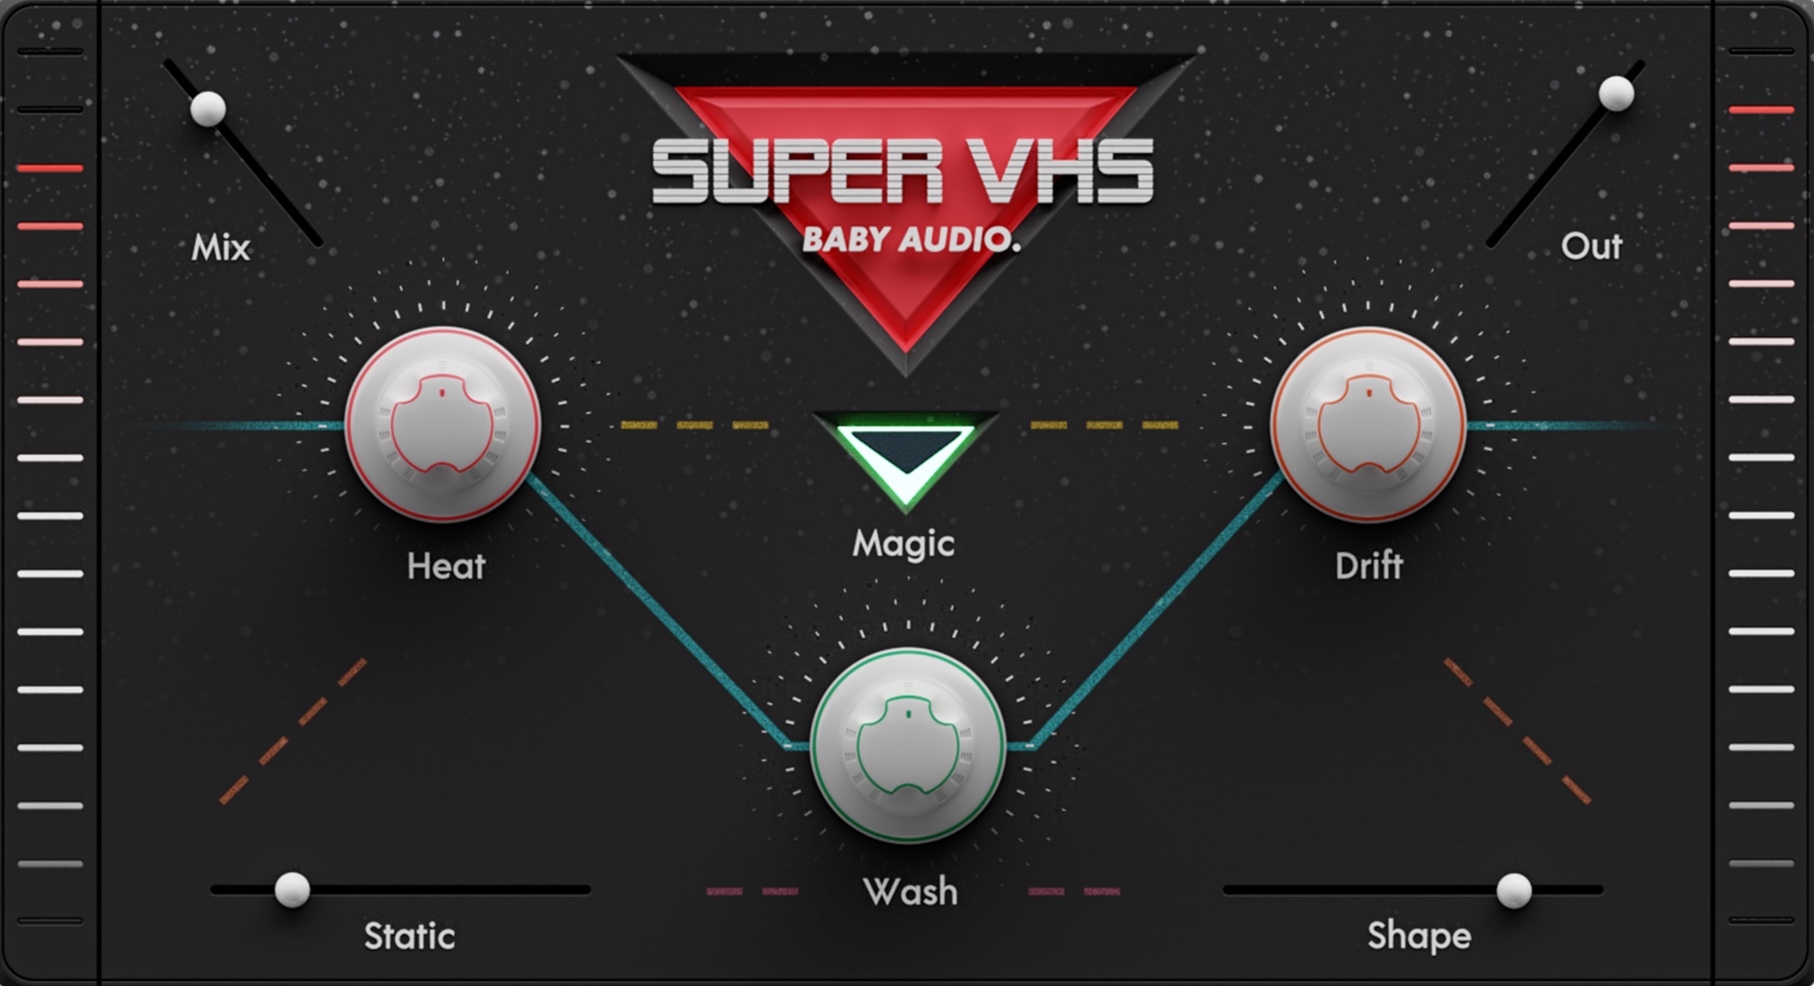
One of my favorite plugins for adding warmth to a track is Super VHS, by Baby Audio
How Do You Add Clarity To Vocals?

To add clarity to vocals, you can first try to "unmask" the vocal by cutting out the "muddiness" in the 200 - 500 Hz range.
If that's not enough, you can try boosting around 5 kHz, or even add a high shelf boost around 9 kHz.
Or, you could even try adding some saturation to the top end of your vocals to help them cut through your mix.
For more help with adding saturation to your vocals, read my article here.
How To Add Telephone Effect To Vocals
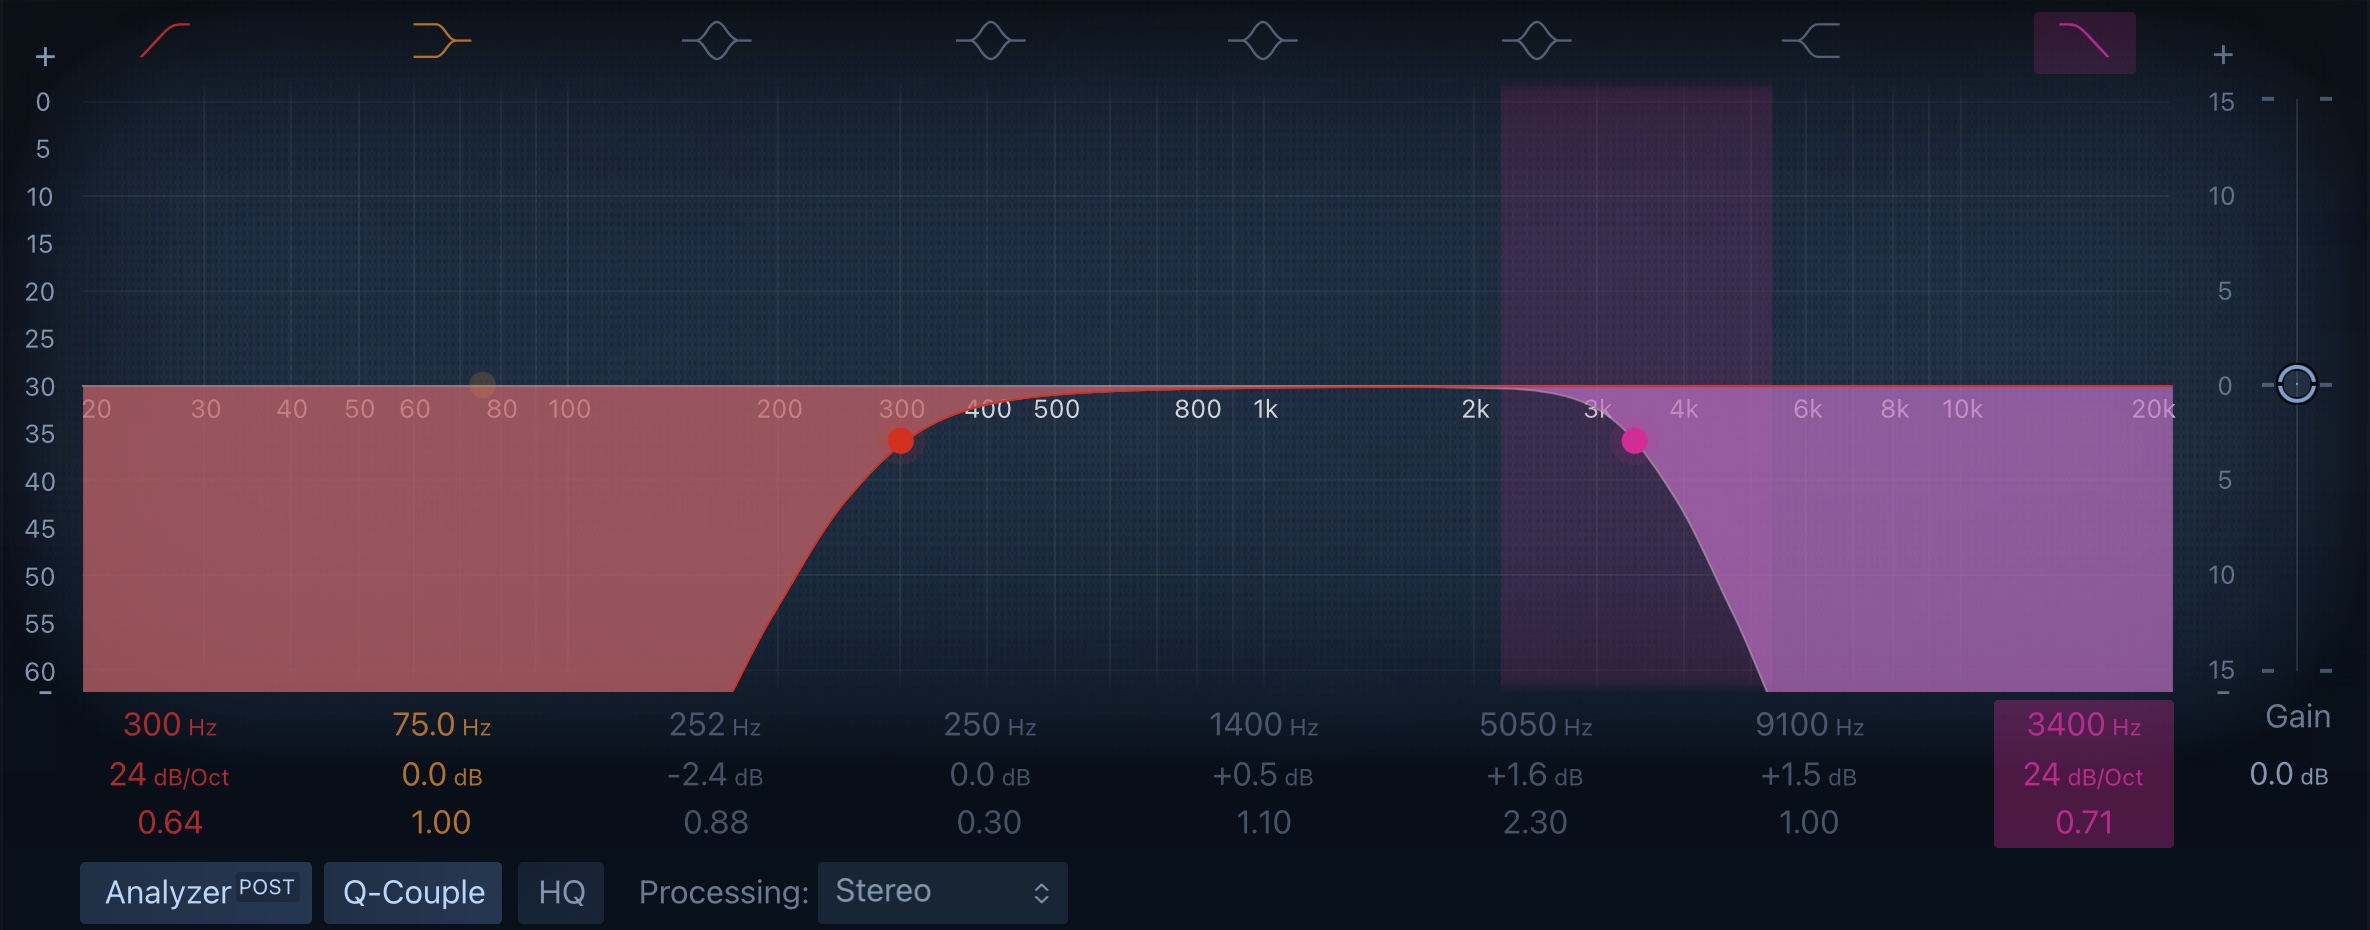
The frequency range of telephones is about 300 Hz (hertz) to about 3400 Hz. Therefore, in order to recreate a "telephone effect" on vocals in a song, use EQ and roll off the low end up to 300 Hz, and roll off the high end to 3.4 kHz.
Pretty simple! However, you lose a lot of volume when you do this, so if your vocal sounds too thin and quiet after doing this, you can try boosting between 1 kHz and 3kHz to compensate.
Or you can try adding in some saturation or harmonic enhancement.
Finish More Radio-Worthy Songs, Faster!
EQing vocals is just one piece of the puzzle when it comes to producing pro-quality songs.
If you want a proven step-by-step formula for mixing radio-worthy tracks from start-to-finish...
Create Pro-Mixes, Faster
Click below to download my free song-finishing checklist to help you create radio-ready songs without taking months to complete them.
This checklist will walk you through a proven step-by-step mixing and mastering process so that you don't ever have to guess or wonder what to do next.
You'll know exactly what to do, and when, so you can quickly mix, master, and finish more tracks.
Next Steps
I hope you found this post valuable on how to get vocals to sit upfront in the mix helpful.
If so, feel free to share, and let me know in the comments below…

