Mastering is the final step producing a song, and it can seem pretty daunting.
Many will even tell you that you shouldn't, or even CAN'T master a song professionally yourself.
But that is balderdash, malarkey, and foolish flummery, I say!
In this article I'll walk you through how you can easily master your own music from home, step-by-step.
Create Better Songs, Faster
Click below to download my free song-finishing checklist to help you create radio-ready songs without taking months to complete them.
What Is Mastering?
Mastering is the final step in the music production process. It's when you take your mixed and edited song and give it that final polish to make it sound radio-ready.
Mastering is usually done by an engineer who specializes in the field, but there's no reason you can't do it yourself from home with the right tools and a little know-how.
What You'll Need To Master A Song At Home

There are really only three steps you need to take in order to master a song at home.
- Applying EQ
- Adding Compression
- Limiting To Set The Correct Loudness Level
But before we get into that, let's talk about what each of those things actually is.
EQ
EQ, or Equalization, is the process of boosting or cutting frequencies in your track to create balance.
This is usually done with a parametric EQ, which gives you more control over each frequency than a standard graphic EQ.
When mastering, a little bit goes a long way, so try not to make boosts or cuts greater than 1 to 1.5 dB.
Compression
Compression is used to even out the levels of your track so that the loudest parts aren't TOO loud and the quietest parts aren't TOO quiet.
This is done with a compressor, which is a plugin that you have in your digital audio workstation (DAW).
Compressing during mastering will help your track to sound cohesive and "glued together".
You may even need to use a multi-band compressor to compress different frequency ranges differently.
Limiting
Limiting is the process of capping the maximum amplitude of your track.
This is done with a limiter, which is another type of plugin that you have in your DAW.
Limiting is what you're going to use to increase the volume of your track so that it matches commercial standards.
Now that we've gone over the big picture, let's get into how to actually do it.
1) Optimize Your Listening Space
The first step to mastering a song at home is to optimize your listening space.
This means making sure that your speakers or headphones are set up in a way that will minimize reflections and produce the clearest sound possible.
There are a few different ways you can do this, but the most important thing is to make sure that your speakers are pointing directly at you and that they're not too close to any walls or other surfaces that could cause reflections.
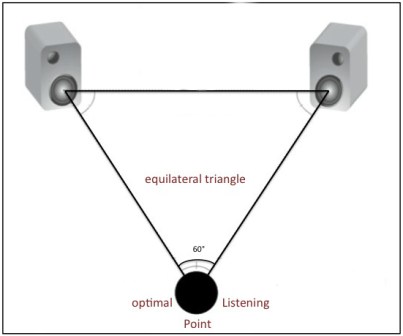
Make sure that the speakers also form an equilateral triangle with you, with the two speakers and your head making up the three points.
You also want to make sure that you're listening in a relatively quiet environment so that you can hear all of the details in your track.
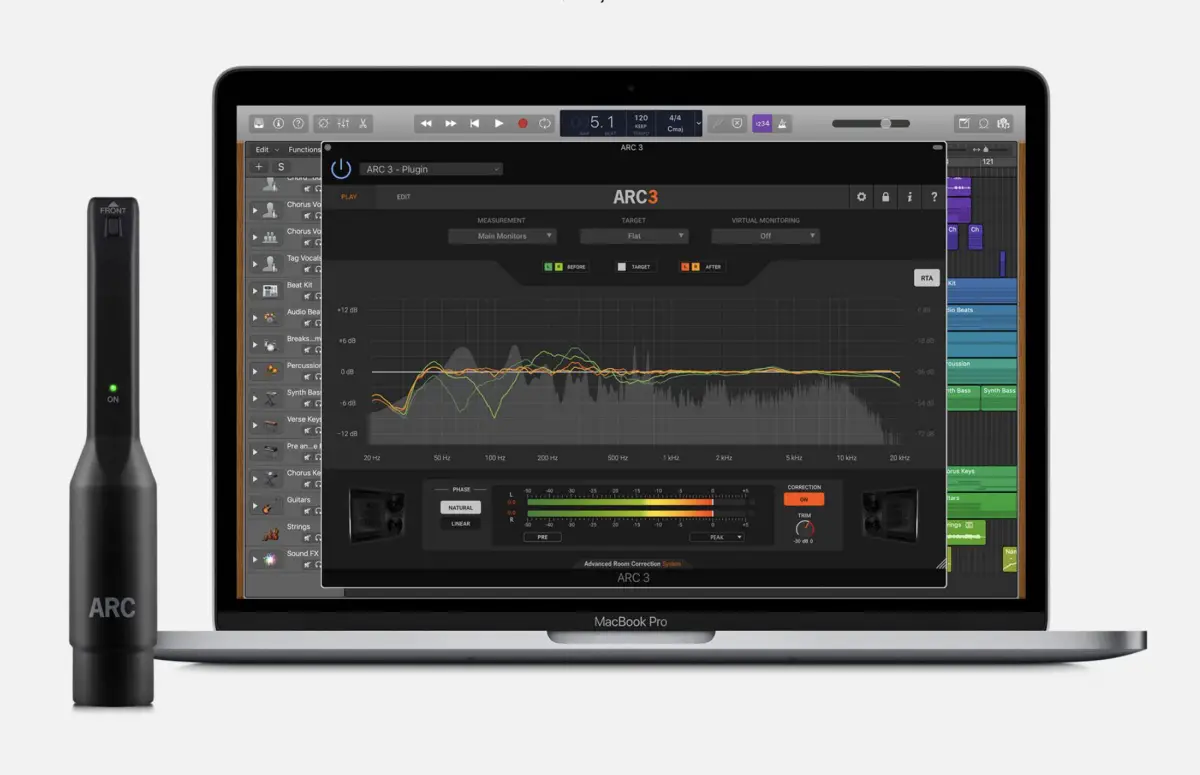
Tuning your room with a tool like IK Multimedia's ARC 3 system will also help you to avoid having your ears tricked by the room.
There's nothing more frustrating than creating a mix or master that sounds great in your room, but horrible in other environments.
Tuning your room will help you to reduce the likelihood of this happening.
2) Make Your Mix Sound Mastered
The second step to mastering a song at home is to make your mix sound as close to mastered as possible.
This means that you want to take care of every problem in the mix before going to master. Don't think you can solve problems in the mix during the mastering phase!
Check out my article here on how to mix a song step-by-step.
A good way to do this is to first listen through your track and identify any problem areas. These are usually places where certain frequencies are too loud or too quiet in relation to the rest of the track.
Also be sure to compare your track to some professional reference tracks while you mix (more on this in a moment).
If you want to be sure you've taken care of everything with your mix...
You can grab my free mixing checklist below...

Create Better Songs, Faster
Click below to download my free song-finishing checklist to help you create radio-ready songs without taking months to complete them.
3) Bounce Down (At the proper levels)
The third step to mastering a song at home is to bounce down your tracks into one single stereo file.
This means exporting your mix from your DAW at the highest quality possible.
When you're doing this, you want to make sure that you're not clipping (or distorting) your audio. To do this, use a metering plugin to make sure that your volume level is hovering around -23 LUFS for your entire mix.
Also make sure to export your mix in a lossless file format so no information is lost or compressed.
Using .wav is the best file format to use.
4) Rest Your Ears
The fourth step to mastering a song at home is to rest your ears.
You've likely just finished your mix, and so now it's time to give your ears a break.
Also, while mixing or mastering, if you find that you're starting to get fatigued, take a break and come back to it later with fresh ears.
Again, use reference tracks while mixing and mastering so that you know roughly how your frequency ranges and instruments are supposed to sound.
5) Consider Your Destination & Loudness Standards
The fifth step to mastering a song at home is to consider your destination and loudness standards. This means that you need to decide where you want your track to be played (e.g. on the radio, streaming services, etc.) and what the loudness standards are for those platforms.
For example, the loudness standard for streaming services like Spotify is -14 LUFS. This means that your track should be exported at -14 LUFS in order to sound its best on those platforms.
In general, it's a good idea to aim for a lower level of loudness (-10 to -12 LUFS) so that your track doesn't sound too harsh or over-compressed when it's played on different systems.
6) Get Genre-Appropriate Reference Tracks
The sixth step to mastering a song at home is to get genre-appropriate reference tracks. This means finding other tracks that are in the same genre as your own and using them as a point of comparison.
This is a great way to see how your track stacks up against other tracks in terms of loudness, EQ, and overall sound quality.
Import 2-3 tracks into your DAW's mastering project right along side your track so you can go back and forth and compare easily.
7) Have The Right Metering Tools On Hand
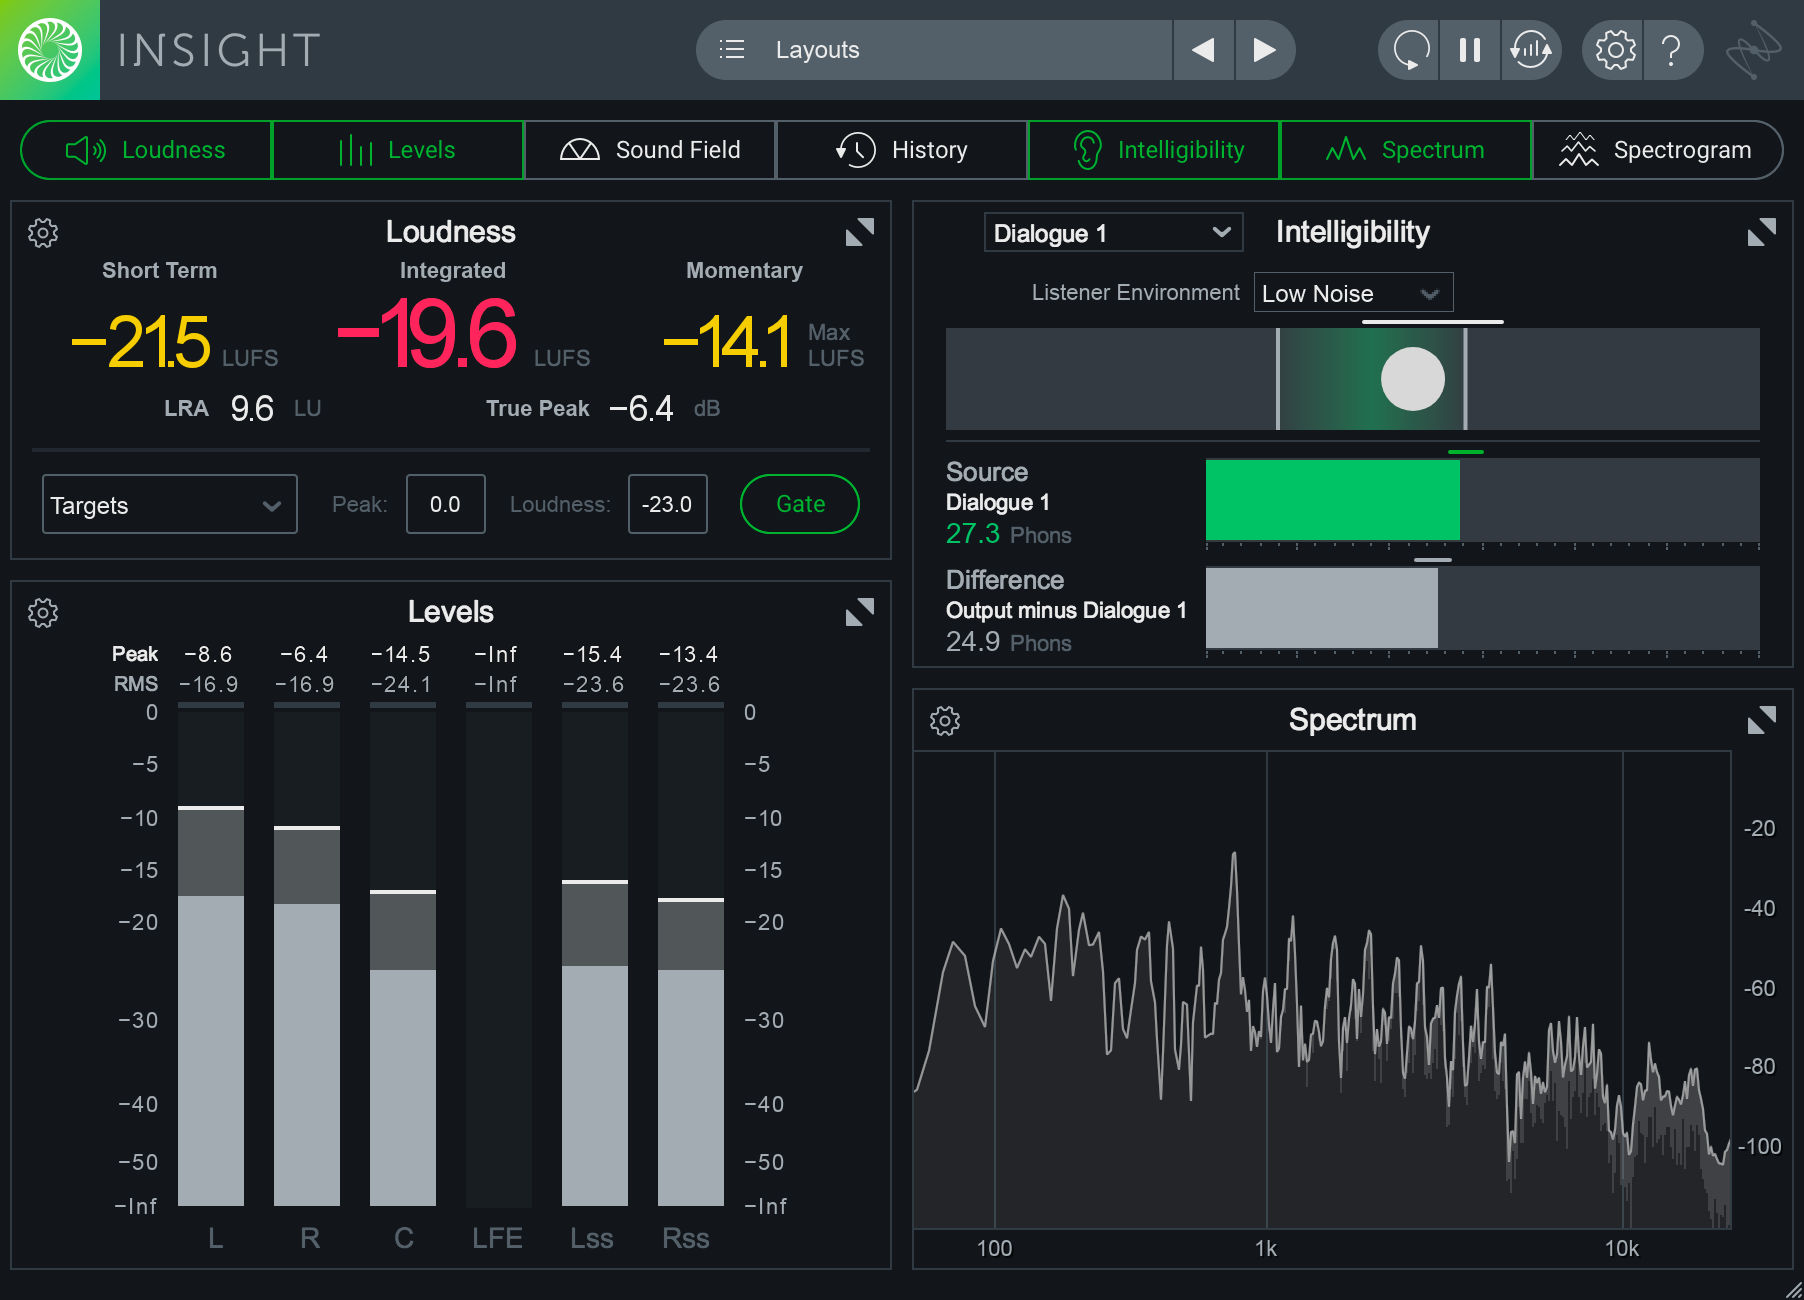
The seventh step to mastering a song at home is to have the right metering tools on hand. This means having a plugin like iZotope's Insight 2 or Ozone so that you can see exactly how your track is sounding.
Having these plugins will help you make sure that you're applying EQ, compression, and limiting correctly.
8) Listen, Compare, & Take Notes
The eigth step to mastering a song at home is to listen, compare, and take notes.
This means that you need to listen to your track as well as your reference tracks and take note of any differences.
You can use a plugin like iZotope's Ozone 8 to help you with this. Once you've identified the areas where your track needs work, you can then start applying EQ, compression, and limiting.
You can even match the EQ curve of your reference tracks and apply it to your song.

Write A Hit Song!
Click below to download my free Hit Creation checklist which demystifies the songwriting process and boils down the techniques hit songwriters use into a simple 9-step formula.
9) Use As Few Tools As Possible
The ninth step to mastering a song at home is to use as few tools as possible. This means that you should only be using EQ, compression, and limiting if absolutely necessary.
If you find that you're overusing these plugins, then it's likely that your track is sounding over-compressed and harsh.
In general, it's best to use these plugins sparingly so that your track sounds natural and polished.
10) Work In Reverse
The tenth step to mastering a song at home is to work in reverse. This means starting with your limiter and then working backwards through your plugins.
This effective because you will be hearing your track at the proper volume level while mastering, and it will volume-matched to your reference tracks.
Limiting
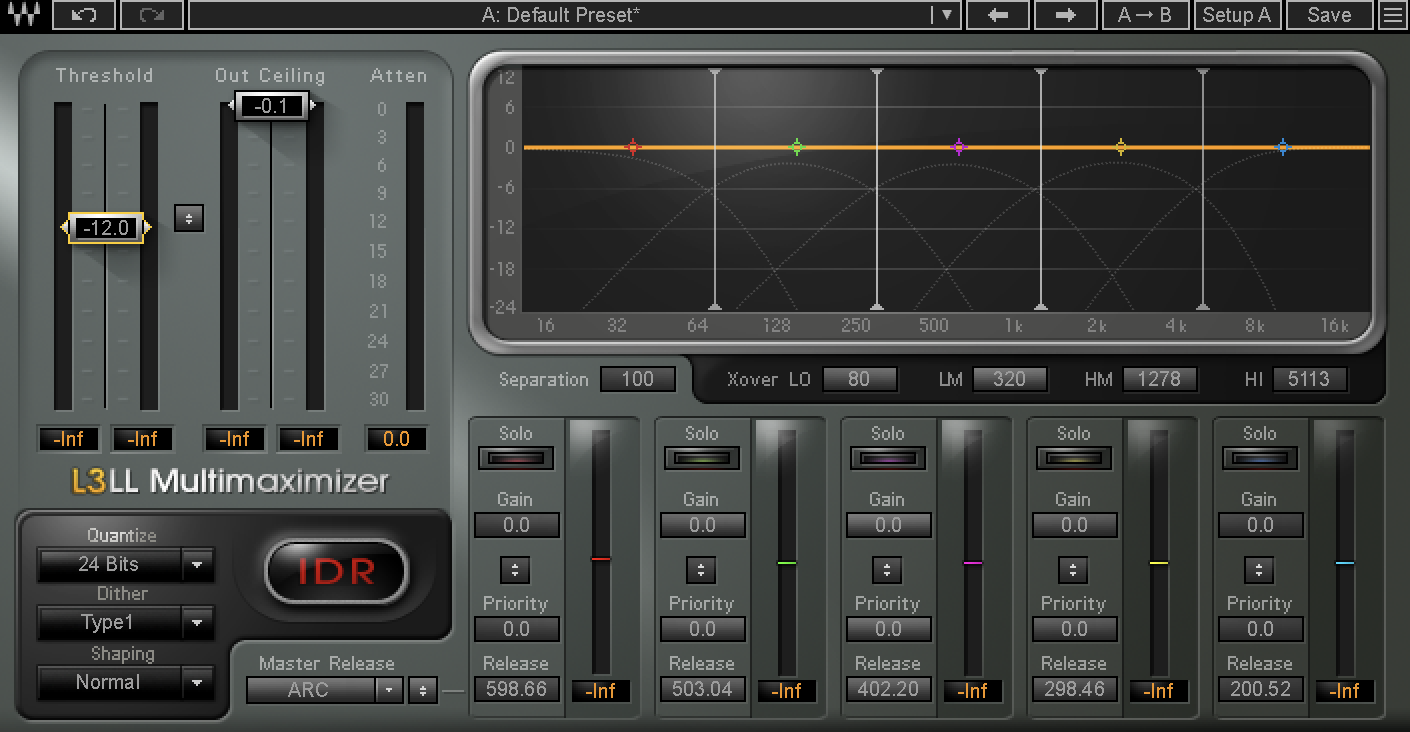
For your limiter, here are the basic settings you want to start with:
- Out Ceiling -0.1 dB
- Threshold -12 dB (if your mix is at -23 LUFS)
You want to keep pulling down the threshold until you start to see a consistent 1-3 dB of attenuation.
Compression
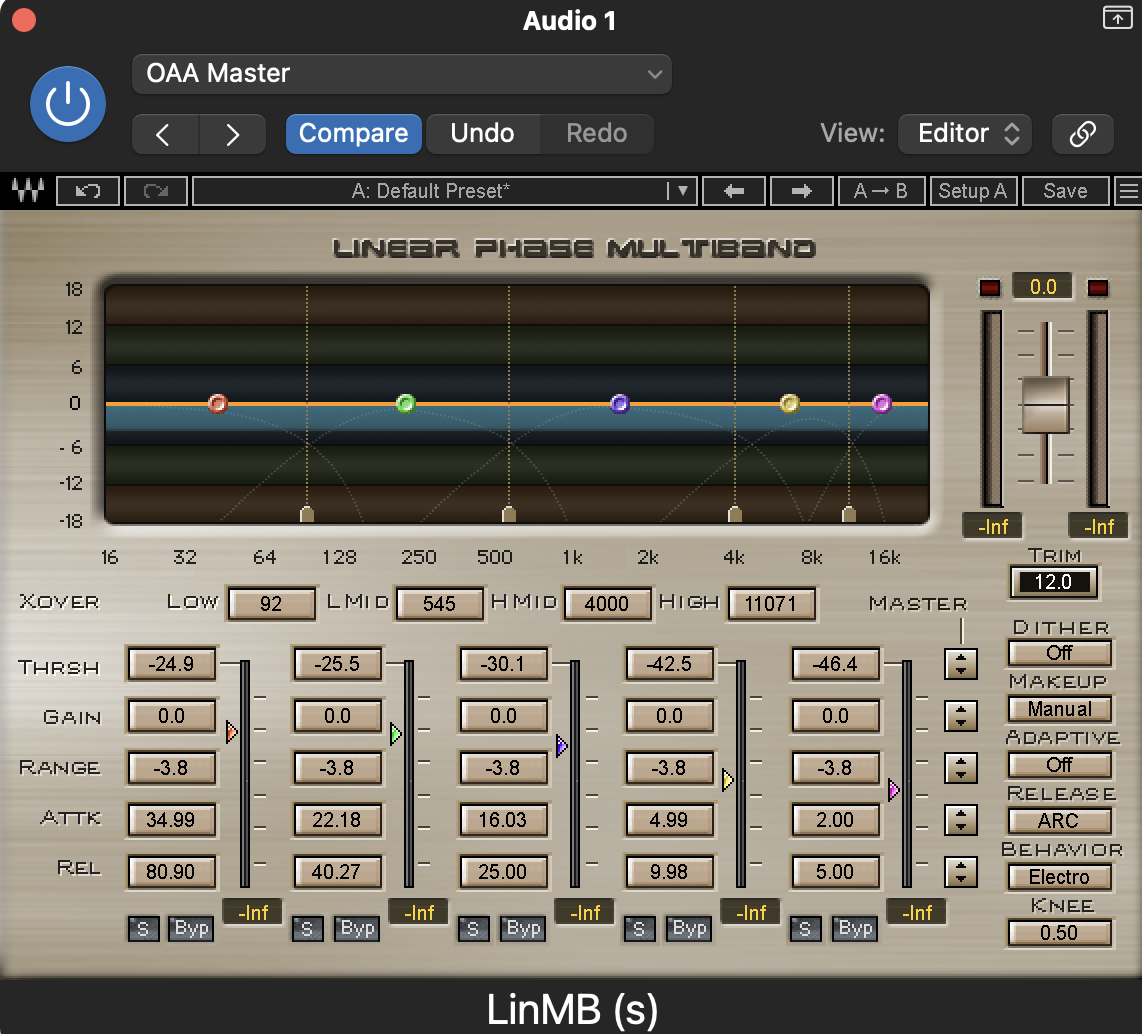
You might just want to use a standard VCA or Tube compressor on your master bus, but I prefer to do that on the mix bus during the mixing phase.
Here is my article on the mix bus plugin chain I like to use.
During mastering, their may be a need to use some multiband compression.
I like to use a multiband compressor if I feel like there are certain frequencies that aren't matching up well with my reference tracks.
You can see in the image above the settings I like to use as a starting point.
You can that the compression ranges are fairly short (we want to be subtle here). The lower frequencies have slower attack and release times to prevent a pumping effect, whereas the higher frequencies have faster release and attack times.
EQ
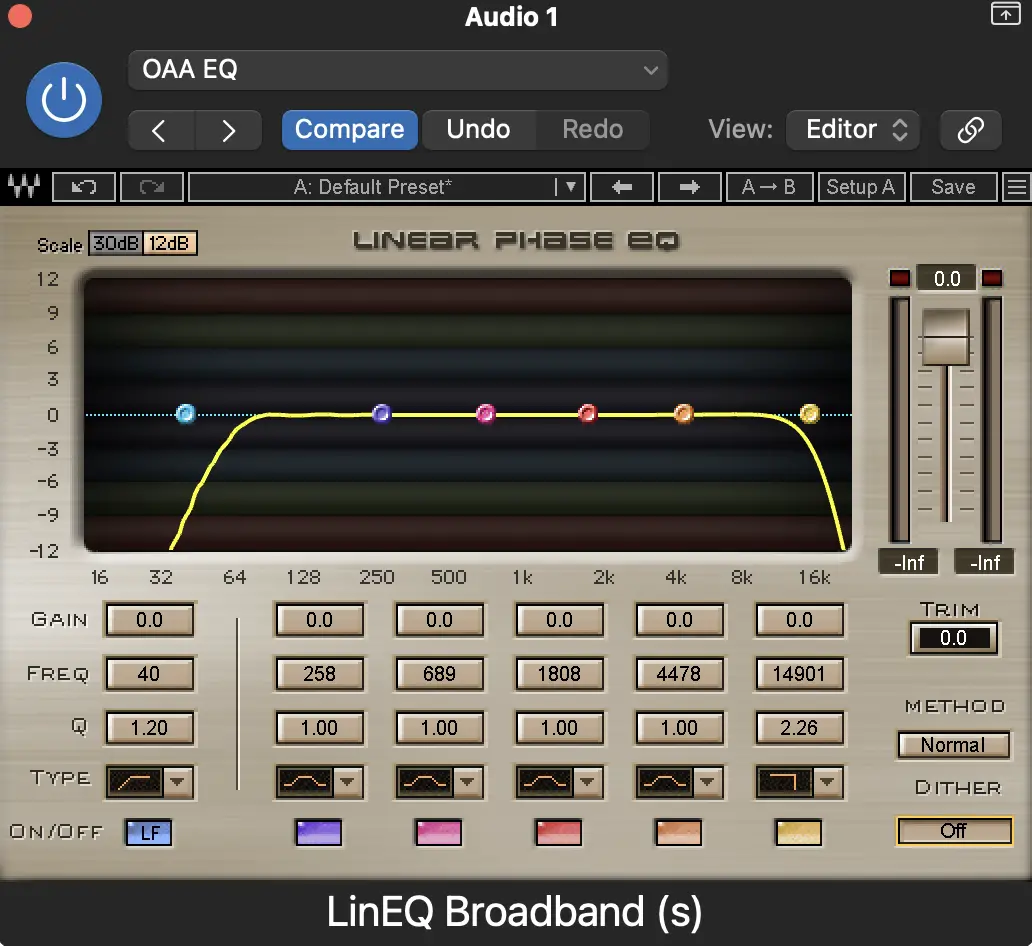
Finally, with EQ, I don't really do anything fancy here.
- Roll off the low end at 40 Hz with a Q of 1.20
- Roll off the high end at about 15 kHz with a Q of 2.26
You can't really hear these low, low, frequencies, and they can just end up making your bass indistinct, and your song too boomy overall.
On the high end, those very upper frequencies can increase listener fatigue, so it's better to just roll those off.
If there are other frequencies giving you problems, you can try cutting by 1-1.5 dB, but I prefer to do this with a multiband compressor.
Remember, with EQ in mastering, once you make a cut, it's there for the ENTIRE song, across ALL of your instruments.
However, with multiband compression, you can gently chop out offending frequencies ONLY when they pop up.
Optional Things
If you've mixed correctly, there really shouldn't be anything else to do.
Optionally, you can add some subtle saturation in the form of console or tape saturation. I like to do this during the mixing phase.
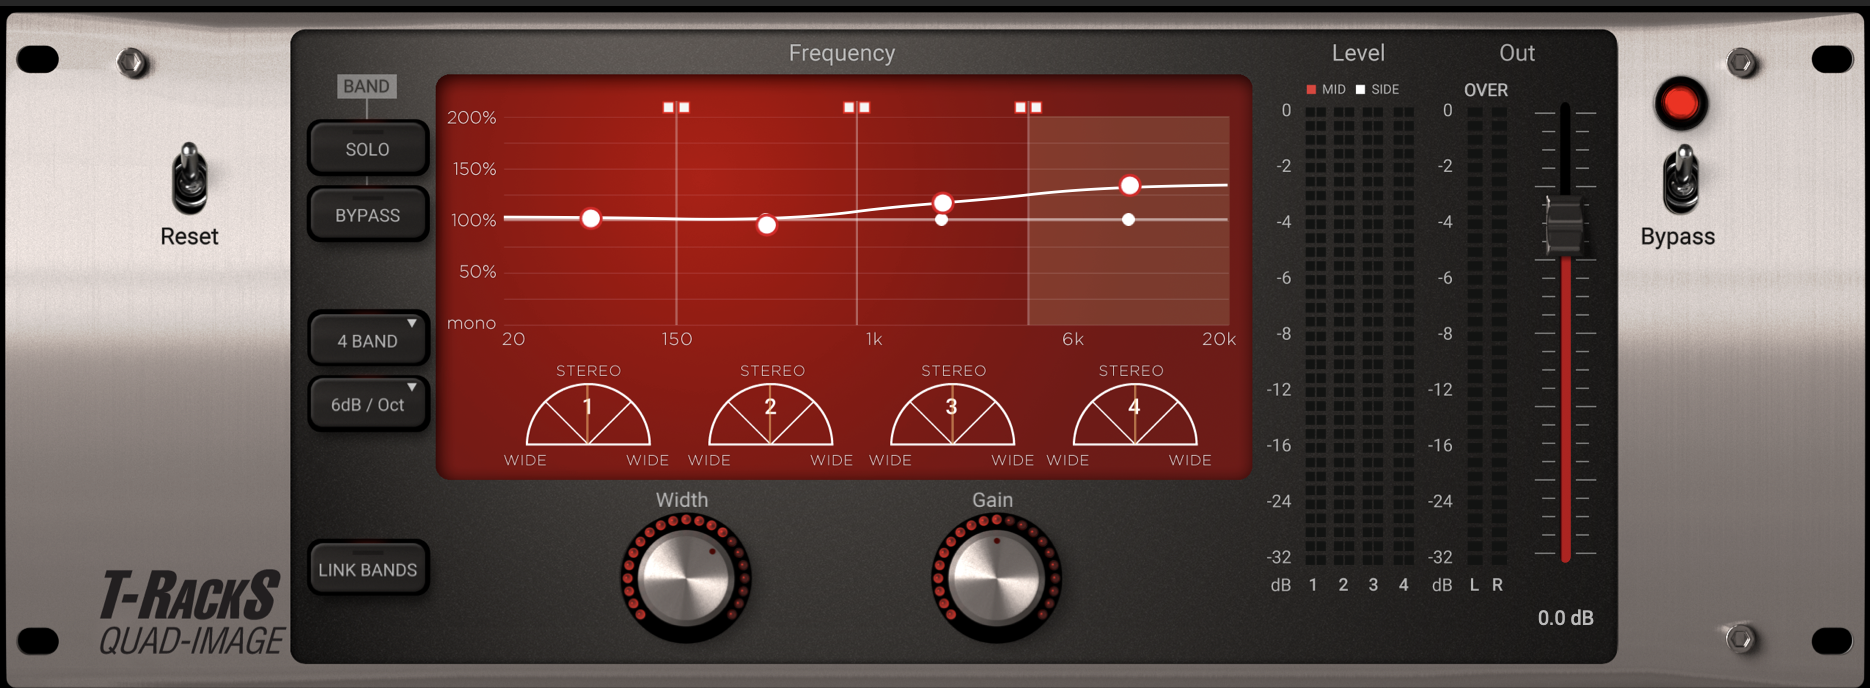
A lot of people like to add some stereo widening during the mastering process, but this is risky, as you could end up throwing your track out of phase, which can cause entire sections of your audio to be canceled out on certain systems and in certain environments.
However, you can generally get away with boosting the stereo width on the the higher frequencies, so you can use a plugin like IK Multimedia's Quad-Image to ONLY spread out those high frequencies.
I break down how to use this plugin in my video below:
11) Make Final Checks & Adjustments
The 11th step to mastering a song at home is to make final checks and adjustments.
This means listening to your track one last time, comparing it to your references, and making sure that everything sounds the way that you want it to.
If there are any areas that need improvement, then make the necessary adjustments.
12) Dither & Bounce (16bit, 44.1kHz)
The final step to mastering a song at home is to dither.
Dithering is a rather complicated subject to explain, and is deserving of it's own article.
But in a nutshell, dithering helps to smooth out a digital signal by adding in some random noise. I know, it sounds like that would actually reduce the quality of your audio, but it actually does the opposite.
This is because of the limitation of 16-bit audio. You have limited pieces of information to try and recreate a highly complex analog sound (your song).
So by dithering, you're adding in some of that randomness which helps with overall sound quality.
Just about any limiter tool will allow to add dithering, so just turn it on, and then bounce your track down to 16bit, 44.1 kHz...
Unless...
Bonus: RX It
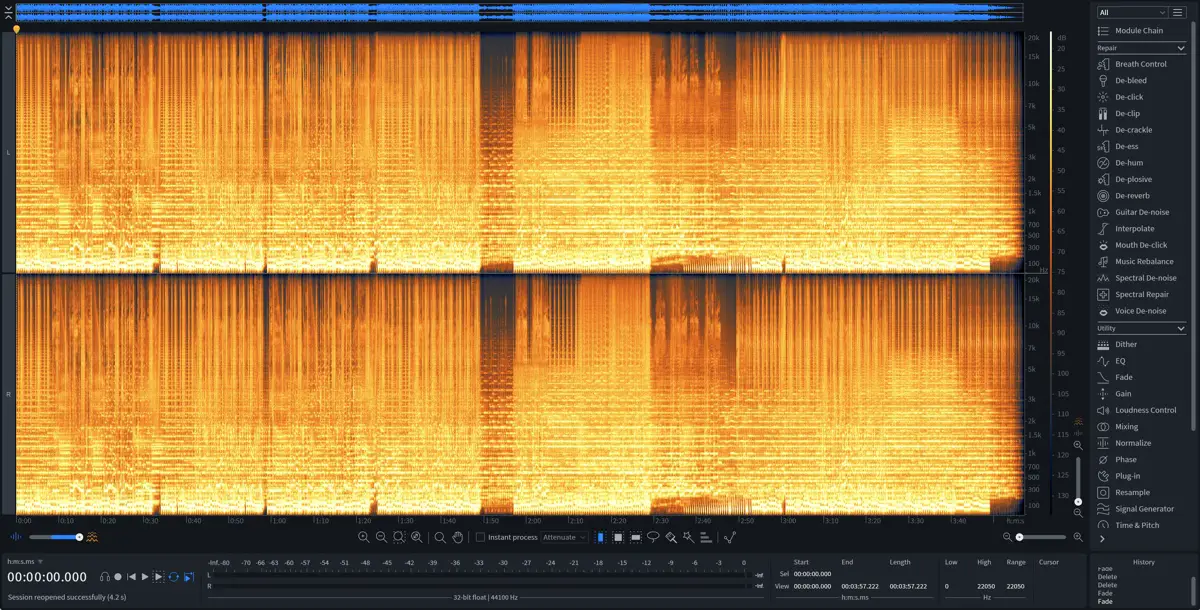
If you want to go the extra mile, you can use iZotope's RX to repair any errors in your track. This is a great way to make sure that your track sounds its absolute best before you release it.
I actually like to use RX as the very last tool in my mastering process, so I'll bounce my track at 24bit, and then add some some finally de-noising to the track before finally exporting it to 16-bit.
If my song fades out, I also apply the fade out inside of RX.
RX is an incredible tool, and I don't say this about many plugins, but this one is definitely a "must-have".
There you have it! Follow these steps, use your ears, and you can master a song at home.
Just remember to take your time, be patient, and utilize reference tracks.
With a little practice, you'll be able to get your tracks sounding great in no time.
To make this even easier on you...
Proven Mastering Checklist
I put together a free mixing and mastering checklist that you can have on hand while your working so you never have to wonder what to do next.
Create Pro-Mixes, Faster
Click below to download my free song-finishing checklist to help you create radio-ready songs without taking months to complete them.
This checklist will walk you through a proven step-by-step mixing and mastering process so that you don't ever have to guess or wonder what to do next.
You'll know exactly what to do, and when, so you can quickly mix, master, and finish more tracks.
Next Steps
If you have your master done, it's time to actually release and promote your song!
I hope you found this post valuable on how to master a song helpful!
If so, feel free to share, and let me know in the comments below…

